Not exactly blessed with beauty, celeriac looks very like one of the gentle and telepathic alien species, the Ood from Dr Who on an off day. It possesses inner loveliness though, once you get past the knobbly, gnarly exterior, there are treats in store: the flavour is surprisingly delicate, crisp, sweet and fresh raw with a gentle taste of celery and a hint of apple. Once cooked it softens and becomes nutty, savoury and mellow.
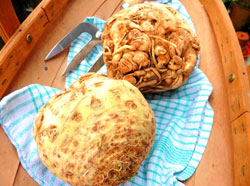
Brutti ma buoni, as the Italians say: ugly, but good!
Eat it grated raw or cut into matchsticks with mayonnaise or French dressing; or boil and mash on its own or half and half with potato. Cubes of celeriac are terrific in stews and it makes a wonderful soup. You can turn it into chips or delicious crisps and even rice it like cauliflower. I have a very nice apple and celeriac cake recipe (yes, really!) I might post one of these days . . . .
Closely related to celery, aka ‘turnip rooted celery’, celeriac is endlessly adaptable and a brilliant vegetable to grow at home for winter harvesting.
Popular on the Continent, especially in France and Germany, it’s time it was more widely appreciated in Britain.
Perfect Partners
Celeriac works in most stews and casseroles and especially loves Cheddar and blue cheese, celery, walnuts, ham, bacon, potatoes and apples.
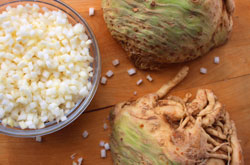
Peeling and Cutting Tips
The surface of celeriac is a bit too uneven for a regular vegetable peeler. Instead, slice skin and bits of root away with a sharp knife. Rubber gloves are handy for extra grip. Exposed white flesh can oxidise and turn brown quickly so squeeze with lemon juice particularly if serving raw. Peel and grate or cut into matchsticks for salads. Cube or dice for cooking.

Slicing and Dicing Tips
A good chef’s knife with a standard 20cm blade will make slicing and dicing celeriac easy.
Cut into small dice and add to slow cooked casseroles and curries for an extra layer of flavour.
Blanching and Freezing Celeriac
Blanch batches of diced celeriac and freeze in sealed freezer bags to use later.
Here’s how: submerge the celeriac dice in boiling water for 1 minute in a colander inside a large bowl. Lift out and plunge into icy water for another minute.
Drain, pat dry and store in sealed freezer bags. Keep the bags flat if you can.
Use from frozen to enhance your stews and curries.
Your Essential Celeriac Preparation Kit
A good chef’s knife with a standard 20cm blade and a comfortable handle will make slicing and dicing the hard flesh easy.
Use rubber gloves for a better grip when slicing.
Have a lemon handy for squeezing over the exposed flesh: celeriac oxidises and turns brown easily.
(Keep a Jif lemon in the fridge for those ‘oh dear, I don’t seem to have a lemon’ moments.)

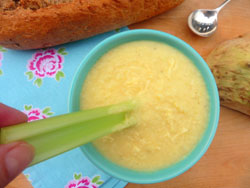
Celeriac Soup: a hug in a bowl with cheese or croutons
This is the perfect winter soup: comforting and nourishing, thick and smooth, but with a little bit of texture and the most gorgeous flavour. Definitely one to warm the cockles of your heart as my grandma used to say (and what are the cockles of your heart when they’re at home?)
Cheese or Croutons? How will you serve yours?
A spoonful of finely grated mature Cheddar cheese finishes the soup beautifully, giving it a fabulous flavour and velvety texture but it’s equally lovely left plain with some toasted croutons bobbing about on the surface, gradually sinking into the soup as the bread absorbs more and more of the flavoursome liquid.

Making Croutons
Cut a thick slice of bread, toast lightly, cut into cubes and shallow fry in hot oil until golden.
Whoever first said ‘soup is like a hug in a bowl’ knew a thing or two!
Serves 4
-
1 onion, diced
-
1 large stick of celery, including leaf, diced
-
1 tablespoon each butter and oil
-
½ medium celeriac (around 500g) peeled and diced
-
600-700g potatoes, peeled and diced
-
Freshly ground black and ground white pepper
-
1 litre hot vegetable (or chicken) stock
Plus
-
Approximately 4 dessertspoons of finely grated Cheddar cheese (use fine side of grater)
-
Crusty bread and celery sticks for dipping
Heat butter and oil in a deep pan and fry onion and celery slowly until soft.
Add remaining vegetables, turning to coat. Season generously with pepper and add stock.
Turn up heat and bring to near boiling. Reduce heat and simmer for around 30 minutes until potatoes and celeriac are soft.
Transfer to blender or food processor with half cooking liquid and process until smooth. Add more liquid if necessary. Return to washed pan and reheat until piping hot.
Pour into warm bowls and serve as it is or stir a spoonful of cheese into each.
Serve with crusty bread on the side and celery sticks for dipping.
Knorr Vegetable Gel Stock Pots

For the past few years I’ve been very enamoured of Knorr Vegetable Gel Stock Pots and happily they are:
-
Free from artificial colours
-
Free from artificial preservatives
-
Free from flavour enhancers
-
Gluten free
-
Suitable for vegetarians and vegans
-
No added MSG
https://www.knorr.com/uk/knorr-products/stock-pots/vegetable-stock-pot.html
Although I make my own stock quite frequently, these lovely little pots of flavour are so nice and so handy to keep in the cupboard. I never use the meaty ones but the herb ones sound interesting.
You can make them up as stock with water or stir them straight into your vegetable base or mirepoix and add vegetable cooking water later.
Sometimes just half a pot is enough: you can wrap the other half and store it in the fridge. If I had any small criticism at all, it might be they are just a teeny tiny fraction too salty but apart from that, thank you Knorr, for such a great product!
My poor old cooking blog is long overdue for some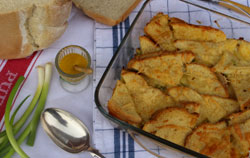 nice new posts, it’s often the way, isn’t it? You hit a busy period and before you know it weeks have gone by without a post.
I hope you are all keeping well and avoiding the winter bugs, I’ve been knocked for six by a particularly nasty one I just can’t get rid of: in fact here I am well into week 2, still with a hacking cough, wheezy chest and general lack of energy. I’m literally dreaming of sleeping lying down instead of propped bolt upright on 3 pillows!
The strange thing is, although normally when I’m ill I’m very good at keeping up with good nutrition, fruit, vegetables, whole grains, fibre and what have you, this time all I can seem to fancy is a small amount of bland, nursery-type food.
White toast, for example instead of seedy wholemeal, Ready Brek instead of my fav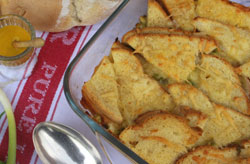 ourite porridge or muesli, maybe a toasted muffin and I have to force myself to eat a blueberry! Not very good at all and I must start eating properly again or I’ll never get better. The interesting thing is, these are all things I loved as a little girl, so as well as the blandness, there may be a comfort factor going on.
If you or family members find yourself in the same boat, see if you can tempt jaded appetites with this lovely, easy savoury bread pudding, soothing and appetising, very old-fashioned; it’s just the thing for a light lunch or supper.
Make a half quantity in a smaller dish if you prefer: use a small egg and make up to 100ml (3½ floz) with milk.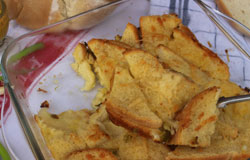
Serves 2-4
3-4 spring onions, sliced, and a small knob of butter
6 thin-ish slices white bread from a small loaf, buttered
75g (3oz) mature Cheddar cheese, grated
Made English mustard & white pepper to taste
1 medium-large egg made up to 200ml (7 fluid oz) with milk
Preheat oven to 160C (fan oven) gas mark 4 or similar 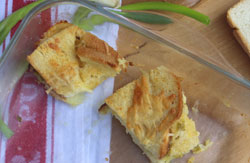
You will need a buttered 20cm (8 inch) rectangular baking dish or similar
Cook the onions in the butter until just tender: either in a covered dish on high in the microwave for 2-3 minutes or in a pan on the hob.
Drain on kitchen paper and set aside.
Make sandwiches with the bread and cheese: prepare as you would toasted sandwiches with the butter side out. Spread a little mustard inside each one and save a little cheese for the top.
Whisk the egg and milk well until no streaks are left.
Cut each round of sandwiches into quarters and arrange in the dish, tucking the onions in between and seasoning with pepper. You may need to cut a couple of sandwiches even smaller to fit giving a patchwork effect.
Pour over the egg and milk and leave to soak for 30 minutes or so.
Scatter with remaining cheese and bake for 25-30 minutes until golden.
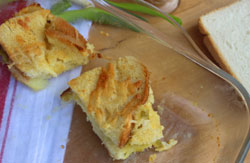
Serve warm. Leftovers are irresistibly tasty cold with a dab of mustard.
Variations
Include some thinly cut ham in the sandwiches if you like and arrange 3 or 4 cherry tomatoes, halved around the Equator, cut side up, on top before the final scattering of cheese.
Funnily enough, since I’ve been poorly, I’ve not been able to look at a tomato but I really want to want one, if you see what I mean!
Back soon with more winter dishes.
Meanwhile, catch up with me on twitter www.twitter.com/mrssimkinscooks
Here’s another toastie treat you might enjoy.
 It’s not unusual in the twenty-first century to visit a cafe or coffee shop in the hope of a nice toasted cheese sandwich for your lunch, and find yourself offered a variety of fancy paninis or ‘toasted flatbreads’ instead. Quite often, these are resplendent with a fashionable cheese that was never intended for toasting.
This happened to me before Christmas in our local Waitrose Café. I’d been looking forward to a lovely croque monsieur which they did for a time, and did it very nicely too.
As I bit warily instead into a sparingly topped and scorched pitta bread, I reflected on how much more successful a nice bit of Wensleydale on a toasted muffin would be.
So over the next week, I made myself one: fabulous!  Here you are, you can have a go yourself and see what you think.
Per person
-
1 large chestnut mushroom
-
½ small red onion or equivalent
-
Approximately ½ tablespoon oil, rapeseed or similar
-
1 toasting muffin
-
Approximately 40g Wensleydale cheese, grated
-
Freshly ground black pepper
Slice the mushrooms and onions: the slices should be nice and thin so they cook through but not paper thin.
Cook the mushrooms and onion in the oil over a moderate heat until soft but barely coloured: keep a lid on the pan for the first few minutes of cooking.
Drain on kitchen paper.
Split the muffin and lightly toast on both sides.
Heat the grill to its highest setting.
Pile the grated Wensleydale onto the muffin halves: there’s no need to butter.  Grind over a little black pepper.
Arrange the mushroom and onion slices generously on top of the cheese.
Grill until bubbling.
Serve immediately with a handful of salad leaves.
 Once again, apologies for lack of posts over the summer. As in previous years, summer flew by with barely a chance to catch my breath, apart from on holiday of course! I did plenty of breath-catching then and even managed to take a few holiday cooking photos to share with you, so here you are.
We usually have a couple of weeks in a cottage in Cornwall and I always enjoy the slightly different style of cooking you do when catering for yourself on holiday.
You are in a different kitchen, usually with just the basic tools and equipment, the shops are different too and you don’t want to spend vast amounts of time cooking.
Where we usually stay in Port Isaac, North Cornwall, there is a fantastic fish merchant, Dennis Knight, right on the harbour, plus crab & lobster across the passage. 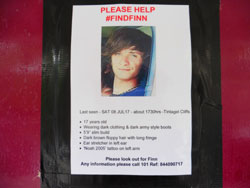 And of course, there are wonderful pasties from Nicki B's pasty shop . . . .
Just before we start though, just have a look at this missing persons’ poster. The young lad in question went missing back in July 2017 on the cliffs at Tintagel and is missing still. Anyone with information is urged to come forward and contact the police quoting case number 844090716 of 09/07/2017 Look online for more details. Twitter hashtag #FINDFINN
 We usually make a really early start on the first morning of our holiday. We get all the packing done the night before and get up at stupid o’clock.
Armed with cheese sandwiches, marmalade sandwiches, hot cross buns, flasks of coffee and juice, the aim is to arrive at Trebarwith Strand as early as possible for breakfast by the sea.
Any leftover sandwiches make a handy breakfast or lunch next day. Open them out and add some extras to your cheese if you like, flatten, and fry on both sides until piping hot and golden.
Marmalade ones fry well too: dip in beaten egg if you fancy a variation on fairy toast, but do allow to cool slightly before eating or you’ll have the roof of your mouth off!
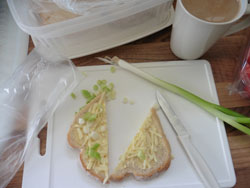
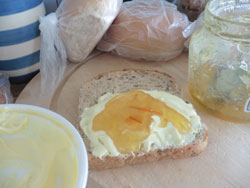 Speaking of marmalade sandwiches: do try these gorgeous ‘foldies’ I discovered this year. I don’t know how I thought of it but suddenly fancied marmalade and clotted cream in a folded over sandwich with my cup of tea for breakfast. I love seedy brown bread and this one was just right: I think it’s Warburton’s.
 Spread cream on half a slice (cream first? Anyone would think we were in Devon!) and then marmalade. Fold over. We used to make folded sandwiches like this when I was a little girl: butter and jam mostly but sometimes honey, golden syrup or marmalade.
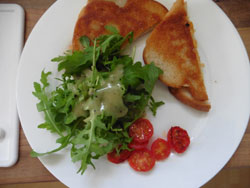
 I love dressed crab, both the dark and white meat: we usually buy some to eat back in the cottage as it’s more affordable and relaxing that way. It’s very filling and my advice is don’t have any bread or much else at all with it. Just a handful of rocket or similar salad leaf, a squeeze of lemon and a dab of mayo is plenty! Oh, and maybe a sliver or two of cucumber.
 Every year we buy a pot or two of crayfish tails from Dennis Knight down on the harbour at least twice.
Try cooking them in butter with a bit of black pepper, some sliced chilli or chilli flakes, garlic if you like and a squeeze of lemon. Serve with any kind of pasta you fancy. Some green salad, mange tout, samphire and garlic bread wouldn’t go amiss either.
 This year we had a few extra so my daughter and I had a fab breakfast: cooked as above with some nice brown toast.
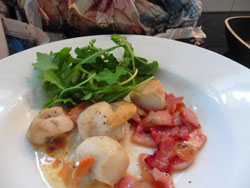 One night we had scallops and bacon: chop up some bacon or buy lardons. Get the bacon cooking first in a drop of oil. Once nearly cooked, add the scallops and a little bit of black pepper, they’ll only take a couple of minutes. Serve with lemon wedges and some salad leaves.
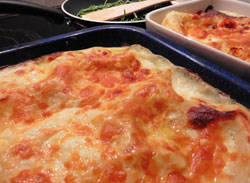
I came up with another holiday fishy favourite this year. I suddenly thought of it as I was walking back from the harbour. Try it, it’s a kind of fish lasagne.
This is just a rough guide; you’ll need quantities to suit how many of you there are.
You’ll need a baking dish suitable for lasagne. We didn't have one big enough so we used two!
 Buy some fish, ideally 3 kinds, white, smoked and something pink: cod or similar, smoked haddock and some crayfish tails, prawns or salmon.
Make a cheese sauce and season with black and white pepper, a pinch of chilli flakes and a dab of made mustard: you’ll need plenty of sauce, slightly more than for normal lasagne.
Slice a couple or more spring onions and fry gently in butter or oil.
Cut the fish into bite-size pieces: it’s a lot easier if you partially freeze it first, the skin comes off more easily too.
Add the fish to the pan with a handful of frozen peas; turn to coat and cook gently for a few minutes.
Pour a little sauce into the bottom of the lasagne dish. Arrange lasagne sheets on top.
Pour half the remaining sauce into the fish mixture and stir. Pour into dish.
Arrange lasagne sheets on top to cover and finish with remaining sauce. Scatter with grated cheese and bake at 180C (fan oven) or equivalent for 20-30 minutes until piping hot and the top is golden.
 This is great served with samphire cooked briefly in a little butter with lemon and black pepper.
I love hevva cake (it’s a Cornish speciality: a lovely crumbly, simple fruited cake, the texture a bit like a cross between a scone and a rock bun)and have my own recipe but I am so making hevva buns this year.
We bought some locally baked ones and ate them up on the cliffs one day with clotted cream and jam. What a treat!
I never got a chance to take a photo as they disappeared so quickly.
 Back Home & still thinking up lovely little snacks
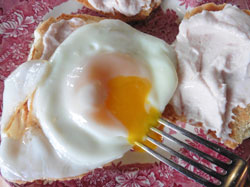
Back home I was still in the mood to think up nice little easy snacks. I’m a big fan of things on toast and also practically addicted to taramasalata. Try a lightly toasted roll topped with taramasalata and a fried egg. It’s absolutely gorgeous!(One of our girls had just laid that egg and it tasted as good as it looks.)
Whiz together the following in a blender for a gorgeous smoothie. Lovely anytime, it’s perfect for breakfast and very soothing if you are feeling a bit under the weather.
Per person
-
15- 20 raspberries, fresh or frozen, defrosted slightly if frozen
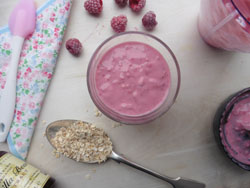 3 heaped tablespoons natural or low fat Greek yoghurt
-
1 level tablespoon porridge oats
-
Squeeze of honey
-
Dash of vanilla extract
-
1-2 tablespoons milk
Tip
Refrigerate the smoothie over- night for smoother, softer oats.
Hopping over the Channel this post, here’s a speciality from Alsace. It’s like a lovely little thin and crispy white pizza, absolutely gorgeous and very easy to make, some of you may have come across it on your travels.
Authentic tartes are made with the local fresh white cheese fromage blanc but full fat crème fraiche is a practically perfect substitute. They are also cooked in a big wood-fired oven but a hot domestic oven works almost as well.
Sadly, I’ve not yet had the pleasure of visiting Alsace myself but came across something similar in Waitrose a while back whilst shopping with my daughter. We looked at it and I said: I can make that! So I did and now it’s a big favourite at home.
If you are pressed for time and have a bread machine you can make the dough in that but otherwise it’s very therapeutic by hand: if it’s a bit sticky at first, get it started by throwing it fairly violently a few times onto the board like that lovely guy James Morton on one of the recent Christmas Bake Offs. It’ll be smooth before you know it!
Then wash your hands, flour them very lightly, work it a bit more and knead into a ball.
You can even keep the dough in the fridge covered in cling film for 2 or 3 days and make a couple of tartes every day.
They are very light: serve one per person for a snack or 2 each for a meal with salad.
Although best eaten fresh from the oven, any leftovers are still tasty cold.
Makes 10
-
300g strong white bread flour
-
1 teaspoon salt
-
½ teaspoon sugar
-
½ teaspoon quick yeast
-
1 tablespoon oil
-
210ml water
(If you have a bread machine make a similar amount of pizza dough)
Plus:
-
200ml full fat crème fraiche
-
1 onion, halved
-
Coarsely ground black pepper
-
200g smoked bacon lardons
-
100-150g Edam, grated (optional)
-
Rocket leaves to serve (optional)
-
Preheat oven to 200C (fan oven) or equivalent
You will need baking trays lined with greaseproof paper
Combine flour, salt, sugar and yeast in a roomy bowl. Use fingertips of one hand to incorporate water and oil.
Knead dough with both hands until smooth and silky (see above).
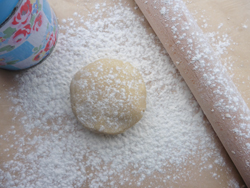
Leave to prove for an hour or so until almost doubled in size. Turn onto a lightly floured board, knead briefly.
Divide into 10 balls and, with a rolling pin, roll approximate oval shapes as thinly as possible. Transfer to trays.
Spread with crème fraiche, smoothing it right to the edges. Slice onions into wafer thin crescents and arrange over the bases. Scatter with pepper, lardons and cheese, if using.
Bake in a preheated oven at 200C (fan oven) or equivalent for 6-8 minutes or until golden and sizzling. Lovely with rocket and homemade vinaigrette dressing.
I love quiche. Any quiche: classic quiche Lorraine (strictly speaking, filled with cream, eggs and bacon only) or the more familiar version with cheese added (which should really be called a savoury flan or tart, but we all know what we mean when we say quiche). Or cheese without bacon. Or with smoked salmon. Or vegetables. Whatever, I love most of them although I’m not over-keen on tomato in quiche. I love a nice slice from a large quiche, or a whole individual one, or 3 or 4 mini ones. I love them warm. I love them cold. I just love them full stop!
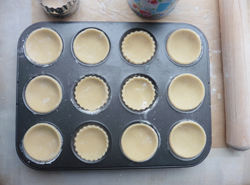
Mini quiches are always popular for parties and picnics, and a nice treat for lunch boxes. They can be a bit of a faff to make though, so here’s a quick way to ‘knock up’ a dozen cheese and onion ones.
Basically, you are going to stir up the filling in a cup, and instead of softening an onion first, you are adding one or two sliced spring onions. There will be no need to bake the cases blind first, they are so small the filling and cases can cook together.
Of course you can use ready-made shortcrust, but the beauty of a home baked quiche is the crisp buttery freshly made pastry. And it’s so quick and simple to make in a food processor. So here we go with a few extra tips in case you need them.
Makes 12
For the Pastry
- 100g plain flour
- 50g cold salted butter, diced
- 1½ tablespoons cold water
For the Filling
- 1 large egg
- 3 tablespoons double cream
- Pinch of mustard powder
- Black or white pepper to taste
- 1-2 trimmed spring onions, including tender green leaves, thinly sliced
- Around 25g grated cheese (mature Cheddar works well)
You will need a 12 cup tart tin, lightly greased with butter, and a 7cm cutter
Preheat oven to 180C (fan oven) gas mark 6 or equivalent
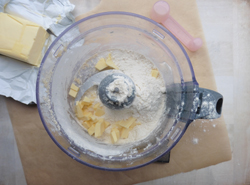
1. Whiz flour and butter together into fine crumbs.
 If you can sit your processor bowl on your weighing scales, it’s even quicker and less faff.
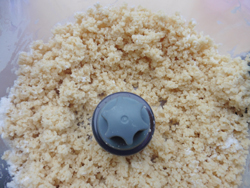
2. Add water and whiz until the mixture starts clumping together.
You need to add exactly 1½ tablespoons with this amount of fat and flour. Use a cook’s measuring spoon. 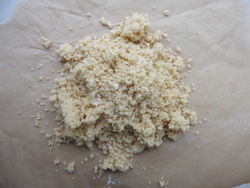 Mine came with my bread machine: very handy with a teaspoon one end, a tablespoon the other and halves and quarters marked inside both.
3. Tip mixture out of machine onto your pastry board or mat. Add no flour at this stage.
A piece of baking or greaseproof paper makes a handy 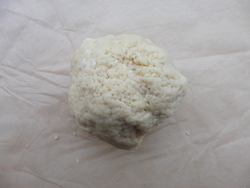 temporary pastry board and cuts down on washing up!
4. Bring the clumps together with your hands and form into a smooth ball (see both pictures, right).
This will make lovely light melt in the mouth pastry, with a nice ‘short’ texture. If you whiz it all the way in the machine until it forms a ball, the 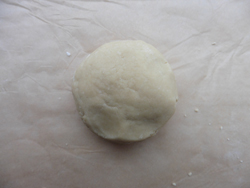 pastry will be tough and heavy (no picture).
5. Now flour the board lightly, dust a little on top of the pastry and on your rolling pin.
 If you flour it before, incidentally, extra flour gets into the pastry and it will start breaking apart. You’d lose the short texture too.
6. Roll out to a depth of ½ cm or a fraction less. Cut out 12 circles in all: you’ll need to re-roll for the last 3 or 4.
Make sure you cut out the circles as close to each other as possible to minimise re-rolling. Re-rolling or 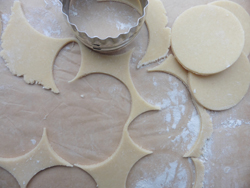 ‘over-working’ the pastry will also make it tough.
7. Transfer the circles to the greased tart tin. Firm them in place very gently.
 8. Using a dinner fork, whisk the egg in a cup with the mustard and pepper. Whisk in cream and stir in onions.
9. Spoon filling into cases: the measuring spoon works well for this as it’s deep rather than shallow and acts like a mini ladle.
10. Scatter tops with grated cheese and bake for around 15 minutes until puffed and golden.
It’s best to grate the cheese in short up and down movements to avoid long strands which are awkward to fit in the tarts, or just cut any long shreds roughly cross-wise with a knife.
These are fabulous warm but still great cold. You can easily double the amount of ingredients to make 24, but you’ll have to make the filling in a larger container.
And of course, you can vary the fillings. Add diced ham (no need to pre-cook as with bacon), add some other vegetables, smoked salmon, or try a different cheese – or no cheese at all, there are no end of possibilities.
You may have noticed, my quiches were mainly cut out with a plain cutter but I did slip in 4 fluted ones. Fluted cutters always look so pretty but are meant to be for sweet tarts, scones and biscuits only: plain cutters are used for savoury items.
This rule (or guideline) must have originated as a useful way to tell tarts apart, in the baker’s shop or country house kitchen, if the fillings weren’t immediately obvious. I remember when I first realised this years ago. I was visiting a country show with my mum and we went to into the baking exhibits tent. One poor soul had got a serious slating for using a fluted cutter for her savoury tarts and I’ve never forgotten it!
Here’s my new rolling pin, pictured top, with my old one underneath. I bought it a couple of weeks ago (£3 from Waitrose). I’ve had my other one for years and years and love it but have been hankering after a plain cylinder one just like my Nana used to have for a while. I was finally prompted by the rolling pin guide rings I found in my Christmas stocking as they don’t fit very easily on my old one.
I can see now why my Nana swore by hers (She even used it to mash her potatoes by pummelling them with one end). It’s much easier to use than my old handled one (you find yourself suddenly using a more professional rolling action) and you can roll over a wider area, ‘crafted from a single piece of FSC-certified European beech’ it said on the label and it feels lovely.
I still love my old one though; it’s been with me a long time and looks as good as new. It’s made from Douglas Fir: something I identified by the grain years ago, but I’ve have only just discovered it’s an ‘artisan shaker’ style. You live and learn!
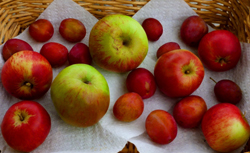
 Although some apple varieties ripen as early as the end of July, September to October is the time we most associate with them. Apple days are held around the country at the end of October to celebrate (even the Archers have an apple day) with cider tastings, bring your own apples to juice, apple variety identification, apple-themed children’s competitions and of course, apple cake competitions.
According to Wikipedia:
Apple Day is an annual celebration of apples and orchards, held in October. It is celebrated mainly in the United Kingdom. It traditionally falls on October 21, the date of the first such event in 1990, but events are held throughout the month.
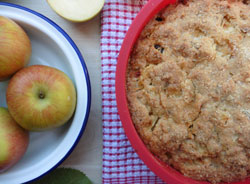
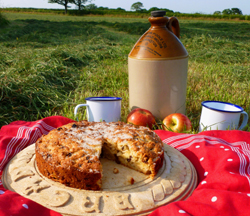
 When it comes to apple cakes, you can’t go wrong with a Dorset apple cake: it’s so easy to make and always popular. In Dorset itself there is fierce debate as to whether a proper Dorset apple cake should contain dried fruit. Many say not, but many do: I usually add fruit to this recipe but leave it out if you prefer.
Eat cold as a cake or warm as a pudding. Either way, it goes beautifully with clotted cream.
Just a couple of tips for complete success:
-
Stick with the measured amount of apple and don’t add extra ‘for luck’ to ‘make it nice’ or ‘use up this last bit of apple’.
- Make sure the cake is completely cold before you put it in a tin. If it’s a still warm it will go all steamy and damp in texture and in all likelihood go mouldy quickly.
 Hooray for silicone cake moulds!
I’ve been making this cake for years and have posted on this topic before but I wanted to bring it to your attention again because for the last 2 or 3 years I have used a silicone cake mould instead of my usual loose-bottomed tin and have never looked back.
The silicone mould does away with any suggestion of a slightly hard or too-dark outside; instead the outside of the cake is all soft and golden and lovely!
Do make sure the cake is completely cold before you unmould it though, or it can stick.
Some other pointers for using silicone cake moulds
-
Grease silicone bake ware in the usual way
- Use on top of a baking tray for support and ease of sliding in and out of the oven
- Don’t lift full moulds up by the rim: they are too floppy and can’t take the strain
- Wash in the top rack of the dishwasher and make sure they are flat and not squashed up against something else or they can distort slightly
- Treat as non-stick and don’t use sharp implements
-
225g (8oz) plain flour
- 1½ teaspoons baking powder
- 110g (4oz) butter
- 110g (4oz) golden granulated sugar plus more for sprinkling
- 225g (8oz) peeled, cored, apples, finely chopped (cooking, eating or a mixture of both)
- 75g (3oz) sultanas or raisins (optional)
- 2 medium eggs, beaten
 You will need a greased loose bottomed 20cm (8 inch) cake tin or silicone mould
Preheat oven to 160C (fan ovens) or equivalent
Sieve flour and baking powder into a bowl and rub in butter. Stir in sugar, dried fruit and apple. Mix in eggs. Turn into prepared tin and smooth top with a wet metal spoon. Sprinkle top with sugar. Bake in a preheated oven for 40-45 minutes or until golden and a skewer inserted comes out clean.
Leave in tin for a few moments, then remove and cool on a wire rack.
 Cool completely before storing in an airtight container. Keeps 2-3 days.
Tip
If using a silicone mould, sit mould on rack and cool completely before turning out.
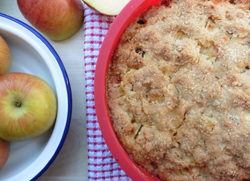
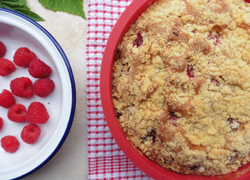
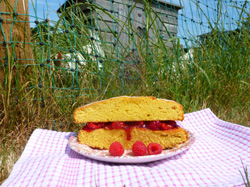
Here’s a variation on the apple cake I made earlier this year: very similar but with raspberries instead of dried fruit and a crumble topping.
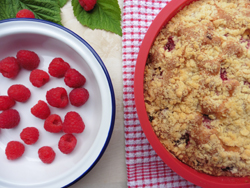 The crumble tastes gorgeous, looks good, adds another texture and protects the raspberries from scorching in the oven.
Crumble topping
- 20g butter
- 40g plain flour
- 20g golden granulated sugar
Cake mix
- 225g plain flour
- 1½ teaspoons baking powder
- 110g butter
- 110g golden granulated sugar, plus extra for finishing
- Either: 225g peeled, cored, apples, diced (prepared weight)
- 2 medium eggs, beaten
- 175g raspberries
You will need a greased loose bottomed 20cm cake tin or silicone mould
Preheat oven to 160C (fan ovens) or equivalent.
Crumble
1. Rub butter into flour: not too finely, some larger buttery crumbs should remain. Stir in sugar. Set aside.
Cake
2. Sieve flour and baking powder together and rub in butter. Stir in sugar and apple. Mix in eggs.
3. Transfer mixture to prepared tin. Press raspberries gently into the top. Scatter evenly with crumble.
 4. Bake for approximately 45-50 minutes or until golden and a skewer inserted comes out clean.
5. Leave in tin for a few moments, before removing. Cool on a wire rack.
Freezing: Both these cakes freeze beautifully: for best results leave in mould, wrap well in greaseproof paper and freeze in a Tupperware container or similar.
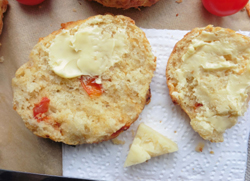
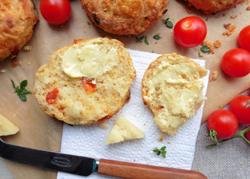 Massive apologies for lack of recipes of late, I’ll be sharing more with you soon. Here’s a nice new one to be going on with. I’ve been oven-drying some tomatoes recently and fancied trying some baked into a savoury scone. I came up with these and they are absolutely delicious, although I say it myself.
Serve fresh from the oven with a dab of butter; a slice of cheese and some tomato relish (see garden blog for a quick homemade one, also a brand new recipe worth trying).
The scones are still good cold and ideal for lunch boxes and picnics but there is just something so lovely about a just-baked warm scone . . . .
Note
If you use bought sun-dried tomatoes, make sure you mop away any oil with paper kitchen towel; otherwise they will sink to the bottom of the scones like syrupy glace cherries in a cake.
 Makes 6-8
-
225g plain flour
- 1 level teaspoon bicarbonate of soda
- 2 level teaspoons cream of tartar
- 40g salted butter, diced
- 10g golden caster sugar
- ¼ teaspoon mustard powder
- Ground white and cayenne pepper to taste
- 75g mature Cheddar cheese, grated plus
- 25g for topping
- 130ml milk, warmed slightly
- 50g oven-dried tomatoes, chopped (see latest garden blog post) or use bought sundried
Preheat oven to 200C (fan oven) or equivalent
You will need a greased and lined baking tray and a 6cm plain round cutter.
-
Sieve flour, raising agents and seasoning into a bowl and rub in butter.
- Stir in sugar, cheese and tomatoes.
- Mix milk in gradually: the handle of a wooden spoon works well.
- Knead gently into a ball.
- Roll out 2 ½ centimetres thick on a lightly floured bo
 ard.
ard.
- Cut out rounds then push trimmings gently back together and cut out again.
- Transfer to baking tray and top with remaining cheese.
- Bake for 8-10 minutes until well risen and golden brown on top.
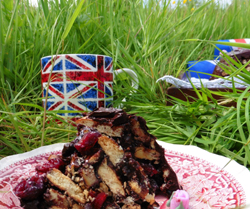
 I made these for the Queen’s 90th birthday a couple of years ago: a mini version of one of her most favourite cakes to celebrate (and also Prince William's favourite: chocolate biscuit fridge cake),
The Queen loves afternoon tea with dainty sandwiches, scones and cake and a pot of tea: which she likes to brew herself. She’s fond of Dundee cake, Victoria sponge (obviously) and Battenberg, but her particular favourite is chocolate biscuit cake. Prince William loves it too: you may remember he had a beautifully decorated chocolate biscuit ‘groom’s cake’ for his and Kate’s wedding.
It seems that chocolate biscuit cake is much in demand with the royal family: it has certainly been Prince William’s favourite since childhood. Apparently, the Queen would make a point of requesting it when she knew Prince William was coming over from Eton for his Sunday tea.
Afternoon tea in the Queen’s apartments at Buckingham Palace usually consists of two types of sandwiches – cucumber is a favourite, scones, often with cream and strawberry jam, small pastries - possibly chocolate éclairs or little jam tarts, and one of the aforementioned cakes for the Queen to cut at. 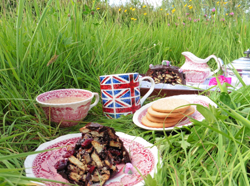 Earl Grey tea is served at tea time, although the Queen’s preferred tea is Darjeeling, which she enjoys first thing in the morning.
Usually, it seems as soon as tea is over she is happy for any leftover cake to go to the staff dining room for staff tea the next day.
But, apparently, when it is chocolate biscuit cake, it’s a different story altogether – the Queen loves it so much she asks for it to be kept and brought back to her own tea table every day until it has all gone. If it appears at tea on Thursdays, and the Queen is going to Windsor Castle for the weekend, she likes it wrapped up and sent over: someone is detailed to carry it by hand.
The Royal chocolate tiffin is made with dark chocolate, granulated sugar, butter, egg and Rich Tea biscuits and is covered with more dark chocolate. There may be glace cherries and nuts. Made in a round cake tin, it’s completely covered in chocolate and decorated.
 Here’s a similar mini version made in a pudding basin. It’s so easy to make: if you have children and teenagers in the house, you can press them into service.
-
3 tablespoons golden syrup
- 75g butter, diced
- Approximately 150g Rich Tea biscuits broken into small pieces
- 25g cocoa powder
- 50g dried cherries
Plus:
- 100g dark chocolate, broken into pieces
- 15g butter, diced
- Decorations of your choice
You will need a lightly greased 1 pint pudding basin, lined with cling film: leave enough over-hang to take hold of easily
 Melt golden syrup gently in a pan and stir in butter. Once butter has melted, stir in biscuits, cocoa powder and cherries. Pile into basin and smooth down evenly with the back of a dampened metal spoon. Make sure the bottom is level as this will be the base of the cake.
Chill for 3 hours.
To cover the cake: microwave chocolate in a heatproof bowl on High, in 30 second bursts: it will take a couple of minutes or so in all.
(Alternatively, melt chocolate in a bowl over a pan of barely simmering water: choose a bowl that will fit comfortably in the top of the saucepan but without the bottom touching the hot water.)
Stir in butter towards the end of melting time.
Loosen cake with a small palette knife and ease out of basin. Stand it, flat side down, on greaseproof paper. Remove cling film. 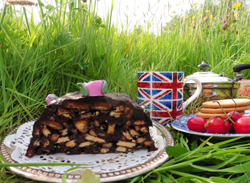 Pour chocolate over the top smoothing it down the sides.
Position decorations before chocolate sets. Trim away excess chocolate from the bottom with a sharp knife and peel off the paper. Keep cool and covered until ready to serve.
Cut the cake at the table, in slices crossways rather than wedges, with a sharp knife dipped in boiling water.
Happy Birthday Ma’am!
Miss Windsor says:
Darling,
Absolutely divine! They say chocolate is an aphrodisiac – I do wonder if it works for our darling queen? Wonderful post and great photos.
Cheerio for now,
Miss Windsor X

I seem to have been majoring on sweet recipes recently so here are some nice savoury ones: just the thing for this time of year. Christmas seems a long time ago now and many of us are craving warm and filling lunches and suppers that aren’t too heavy on the calories.
Recently the humble cauliflower has had a bit of a surprising makeover. It’s been taking centre stage as an integral part of the well-publicised Paleo diet*. Originally intended as a rice substitute for those following the diet, cauliflower rice is so delicious it has a much wider appeal.
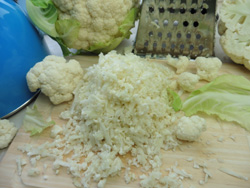 It’s simple to prepare, tasty, nutritious, light on calories and inexpensive.
Preparation
Grate raw cauliflower on the coarse side of a box grater, including some of the tender inner stalk.
Half a medium cauliflower serves 1-2.
Alternatively, use a food processor with the grater blade attached or pulse with the main mixer blade. The latter will result in a ‘bobblier’ but equally good texture.
 Cooking Times
Steam for 5-7 minutes: a microwave steamer works well.
Alternatively, stir fry for 5-7 minutes using approximately 1 tablespoon oil per half medium cauliflower.
*The Paleo diet is based on the types of foods hunted and gathered by our distant Palaeolithic ancestors. It’s quite extreme in that only meat, eggs, vegetables, nuts, fruit and seeds are eaten with no grains, pulses, legumes or dairy. Everything is as fresh and natural as possible with no processed foods.
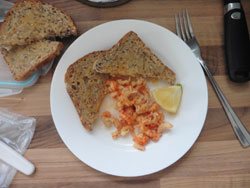
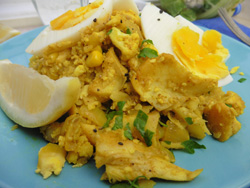
Fish Fingers, Cauliflower Rice, Baby Leaves and Pomegranate Seeds
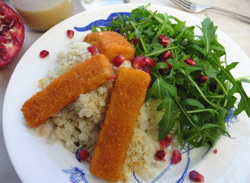 There are some ‘proper’ cauliflower rice recipes coming up, this is just a serving suggestion but so delicious! It’s one of my favourite lunches when I’m at home on my own so I thought I’d share it with you: here's a photo I took the other day. I'm using one of my favourite plates:a reproduction from a set of cat plates once used in the servants hall at Kingston Lacey House in Dorset.
Grill yourself 2 or 3 fish fingers (or fry in a tiny amount of oil). Watch them carefully so they don’t burn. Serve with cauliflower rice, a handful of baby salad leaves – or just rocket – with honey mustard dressing and a scattering of pomegranate seeds. Just gorgeous!
Honey Mustard Dressing
Shake together 3 parts of rapeseed oil to 2 of cider vinegar with 2 teaspoons of 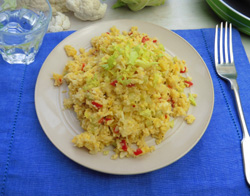 Dijon mustard and a generous squeeze of runny honey.
Funnily enough, I’ve always been a bit ‘take it or leave it’ when it comes to egg fried rice. Yes, it’s pleasant, and I don’t mind it, but I wouldn’t go overboard. Honestly, this version with cauliflower is a completely different story and so tasty!
The cauliflower brings an extra nutty sweetness to the dish: It’s only slightly dissimilar to rice but distinct enough to make a difference.
For 1-2 servings: fry ¼ diced red and ¼ diced yellow pepper, 1 small sliced onion and a diced stick of green celery for 2-3 minutes in 1-2 tablespoons of oil. Add ½ grated head of cauliflower and fry for a further 5-6 minutes.

Make a central well. Pour in 2 beaten eggs. Cook until almost set before stirring through the cauliflower mixture.
Serve immediately.
Note
You can add spices such as Chinese 5 spice powder, chilli powder, grated fresh or ground ginger but honestly, the flavour is already so good you hardly need anything more.
This traditional old country house breakfast staple works brilliantly with cauliflower rice. Don’t skimp on the long slow cooking for the onions at the beginning as this is absolutely key to the flavour.
 Serves 2
-
110g smoked cod or haddock fillet
- Cold water to cover
- 1 bay leaf
- 1 medium onion
- 1 stick of celery (optional)
- 2 tablespoons oil
- 1 level dessert spoon of Madras curry paste
- ½ teaspoon turmeric
- 250g cauliflower, riced
- 50g sweet corn kernels
- 2 eggs, hard boiled for 7-8 minutes
Plus: wedges of lemon and mango chutney to serve
Lay fish skin side down in a pan with bay leaf and water to cover. Cook gently for 5-7 minutes until the flesh becomes opaque.
Slice onion and celery, if using. Fry slowly in oil until soft and melting. Stir in curry paste and turmeric. Add cauliflower and sweet corn and stir until completely coated.
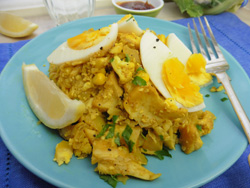 Stir in 80-100ml of the poaching liquid. Remove skin from fish and flake into the kedgeree.
Cook for 5-7 minutes until cauliflower is soft and everything is piping hot. Add a drop more poaching liquid if it seems dry.
Serve with quartered hard boiled eggs, lemon wedges and mango chutney.
Freezing Cauliflower Kedgeree
This freezes beautifully: cool quickly and once completely cold pack into freezer bags or plastic freezer boxes filled to the brim. Exclude all air. Defrost in the microwave for best results. Microwave or stir-fry until piping hot.
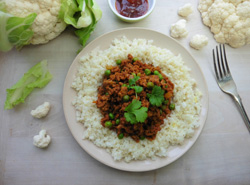 Cauliflower always goes beautifully with lamb and this lightly spiced dish is no exception. Keema literally means ‘minced meat’. The spices used here are based on traditional keema curry spices.
Serves 2-3
- 1 medium onion, diced
- 1 stick of celery, diced
- 2 tablespoons oil
- 2 small red chillies, sliced
- 1 clove garlic, finely chopped
- ½ teaspoon cinnamon
- ½ teaspoon ground coriander
- ½ teaspoon ground cumin
- ½ teaspoon turmeric
- 400g lean minced lamb
- 2 tablespoons tomato purée
- 4 tablespoons hot water
- Freshly grated ginger, to taste
- 75g frozen peas
Plus:
- 1 medium cauliflower (250-300g) riced & steamed for 5-7 minutes as before
- Coriander leaves
 Fry onion, celery and chilli slowly in the oil until soft and the onion is beginning to colour. Add garlic and spices, stir thoroughly and cook for a few minutes more over a low heat.
Add lamb, stir to coat and cook over a medium heat for 10 minutes or until browned.
Fry onion, celery and chilli slowly in the oil until soft and the onion is beginning to colour. Add garlic and spices, stir thoroughly and cook for a few minutes more over a low heat.
Add lamb, stir to coat and cook over a medium heat for 10 minutes or until browned.
Add tomato puree, water and ginger. Continue to cook over a medium heat for 5 minutes then add peas. Cook for a further 5 minutes.
Garnish with fresh coriander and serve with the cauliflower rice, mango chutney and yoghurt. Hard boiled eggs also work well.
If you prefer, you can stir the cauliflower rice through the keema as a kind of biryani: both ways are delicious.
 Here’s another: “Why don’t we have tea in the garden?” recipe. These gorgeous little cakes are the true taste of an English country garden in mid-summer. Perfect with a cup of tea and a nice deck chair.
Rose water is distilled from rose petals and has the most beautiful powerful scent. Add with a light hand: start with a few tiny drops, you can always add more.
A food processor makes short work of both cake mix and buttercream
Makes 15 domed or 18 flatter cakes
-
175g salted butter, softened
- 175g golden caster sugar
- Grated zest of 1 large lemon
- 175g very fresh self-raising flour
- 2 medium-large fresh eggs
- 2 tablespoons milk
- Essence of rose water to taste
Preheat oven to 160C (fan ovens) or equivalent
You will need 2 x12 cup muffin tins (or 1x12 & 1x6) and muffin/cupcake size cake cases
 Whiz the butter, sugar and lemon zest together until combined and fluffy.
Sieve half the flour over the mixture, add eggs and remaining flour. Whiz again.
Add milk and rosewater and whiz until beautifully smooth yet not over-mixed: you may want to stop the machine a couple of times and scrape the mixture down with a flexible spatula.
Half fill each paper case and bake for around 15 minutes or until risen and golden and springy to the touch. A skewer inserted should come out clean.
Cool on a wire rack.
Rose Buttercream
-
225g sieved icing sugar
- 110g softened salted butter
- 3 tablespoons sieved lemon juice, plus extra on standby
- Essence of rose water to taste
Tip the icing sugar into the clean dry processor bowl. Whiz briefly to eliminate any persistent clumps. Add butter and whiz to combine.  Add lemon juice and a few drops of rosewater. Whiz until smooth, adding more lemon juice and rose water if required.
Colour half the buttercream pink with pink food colouring.
Once the cakes are completely cold pipe with swirls of buttercream using a large star nozzle.
Scatter with pink sugar sprinkles and top with tiny rosebuds: polyantha ‘fairy’ roses are ideal.
Tip
If you are a dab hand with the icing bag you can tint the buttercream a more intense pink and mimic a rose shape with a ‘rose’ icing nozzle.
 One of the many lovely things about summer is being able to have tea in the garden.
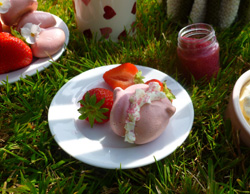
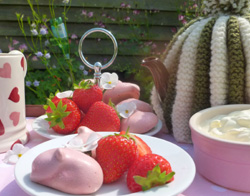
Light as a summer breeze, these gorgeous little pink mini-meringues are completely simple to make and perfect with strawberries and cream - and cup a of tea, obviously.
The amount of pink colouring seems rather startling: and it does look a bit violent when you first put it in, but the colour soon fades in the oven.
 Tips
Tips
Don’t forget; only bake meringues at a low temperature: you just can’t rush a meringue. Also, meringues hate grease so make sure your equipment is grease free. Make sure too, everything is properly dried before you start.
Crisp & Dry or Squidgy & Chewy
If you want your meringues to be explosively crisp and dry throughout: flatten and spread out the blobs of meringue more on the baking tray and make sure they dry out thoroughly in the turned-off oven after baking.
 If you prefer them to have that dangerously more-ish delectable squidgy centre then mound them up so they are higher and cover a smaller area.
And Another Thing
It’s worth knowing, if you find yourself without weighing scales, the proportions are 2 medium-large egg whites to 6 level ordinary kitchen tablespoons of caster sugar.
Makes approximately 24 ‘teaspoon’ meringues
-
2 very fresh egg whites
- 100g white caster sugar
- 1½ tablespoons pink food colouring – or to preference
 You will need an electric hand whisk or manual rotary whisk and 2 baking sheets, lined with baking parchment
Preheat oven to 100C (fan oven) or equivalent
-
Whisk the egg white into ‘soft peaks’- that is the peaks should still fall over slightly and not be completely rigid.
-
Add a level tablespoonful of sugar, whisk it in and continue whisking in a spoonful at a time until all the sugar is incorporated.
Don’t over whisk and don’t add more than a level tablespoon each time.
-
Arrange teaspoon-size blobs of meringue on the prepared trays – space them out, not because they will spread, they won’t, but you need to give each meringue a bit of room for the hot air to circulate.
-
Bake for an hour or until you can peel them off the paper easily.
-
Leave them in the oven with the oven door slightly open until the oven has gone cold so they can finish drying out.
-
Once they are completely cold they will just lift off the tray. Store in a completely dry, airtight container for up to 6 weeks.
Eat as they are, or with strawberries and softly whipped cream. Try sandwiching two mini-meringues together with cream.  If you can find any crystallised rose petals they would be fantastic sprinkled over the cream. I’ve not been able to find any for ages – nor the crystallised violets - but pink sugar looks pretty too. Serve with strawberries on the side.
 Eggs-tra Bonus Mini-Recipe and find out about Cake Tunnelling.
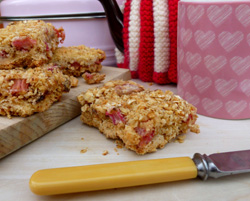
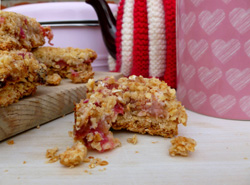
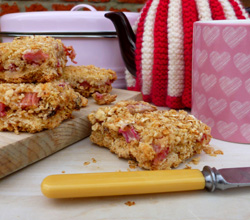 Vibrant pink stalks of rhubarb racing away in the garden are always a welcome sign of spring. Forced and early garden rhubarb are especially good for baking. Sharp and reviving, rhubarb adds an extra dimension to sweet cakes and pastries.
These more-ish crumbly bars are perfect with a cup of tea or coffee and make the most brilliant tempting breakfast treat with a dollop of yoghurt – especially if you can snatch a few minutes to have your breakfast actually in the garden on a sunny morning.
The recipe is simple as the base and crumbly top are the same mix: the base compressed and pre-baked, the top loosely scattered. There’s a second dry mix of flour and sugar as well to coat the rhubarb – you don’t even need to it cook first.
If you own one of those lovely wooden 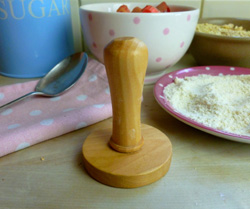 pot tampers for compressing compost when sowing seeds but never liked to use it and get it dirty as it looks so nice (yes, I am that person) you’ll find it ideal for compressing the base – just oil it slightly first.
Makes 8 bars
-
450g forced or early rhubarb, sliced into 1 cm pieces
Plus:
Dual purpose mix for base and topping:
- 100g plain flour
- 25g wholemeal flour
- 100g salted butter, diced
 150g porridge oats
- 100g golden granulated sugar
Dry mix for coating rhubarb:
- 50g golden granulated sugar
- 25g plain flour
Preheat oven to 180C (fan oven) or equivalent
You will need a greased and lined 20cm brownie pan
Don’t forget: you need to part-bake the base first: add the filling and crumble topping whilst the base is still hot before returning it to the oven.
 Base and Topping
Rub the butter into the flours. Stir in the oats and sugar.
Spread two thirds of the crumble mix (a little over 300g) into the prepared tin. Smooth down firmly: you can use the back of a metal spoon for this but actually a pristine clean pot tamper is the ideal tool for the job!
Reserve the remaining crumble (around 150g or so) for the topping.
Bake for 12-15 for minutes until firm and beginning to colour.
 Dry Mix
Meanwhile, combine the sugar and flour. Add the rhubarb and mix thoroughly. Spread over the base whilst it’s still hot from the oven: including any coating left in the bowl. Scatter the reserved crumble mixture evenly on top.
Return to the oven and bake for 30-35 minutes until golden. Mark into bars and cool in the tin.
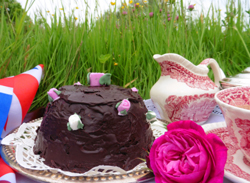
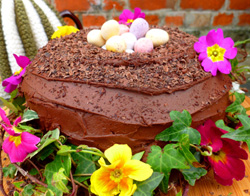
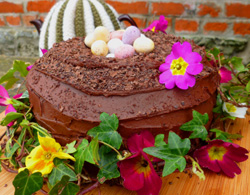
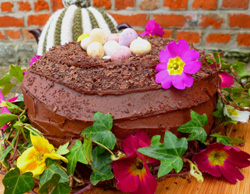 This jolly little egg-filled nest is the Easter equivalent of a Yule log: gorgeously light chocolate sponge generously covered in chocolate buttercream and decorated on a seasonal theme. Just the thing for Easter Sunday tea.
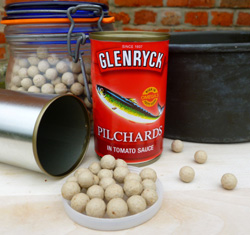
Smaller Bundt or Savarin cake pans aren’t easy to get hold of (and they’re quite pricey too) but you can easily improvise your own home-made version with an 18cm (7inch) loose bottomed cake tin and an empty (very well-washed) pilchard can.
Don’t forget to weigh the can down with baking beans though – otherwise as the cake rises it will push the can up with it!
Obviously, this would never happen to me. I, myself, naturally, instinctively knew better than to put an un-weighted can in the middle of a cake.
Ahem. . . well, anyway, you live and learn. . . .
A food processor makes short work of both the cake and the buttercream icing. You (or various family members) can have fun with the decoration: start off with a good grating of dark chocolate; pile sugar coated mini eggs into the middle, and pretty up the whole thing with edible spring flowers. *
 *Edible Flowers
Pansies, violas and primroses are all edible but anything grown from a bulb tends to be toxic to some degree.
Non-Edible Greenery
A garland of fresh green trailing ivy leaves looks terrific but do be aware that ivy leaves are toxic and that handling the leaves can cause skin irritation in some people.
New!
Incidentally, have you seen those new cute little micro eggs in a couple of supermarkets this year? Just like mini eggs but really tiny. Expect all the big brands will be doing them next year.
Cuts into 8 generous slices
-
175g (6oz) salted butter, softened
- 175g (6oz) golden caster sugar
- 150g (5oz) plain flour
- 25g (1oz) cocoa powder
- 1 level teaspoon bicarbonate of soda*
- 2 level teaspoons cream of tartar*
- 3 medium eggs
- 2 tablespoons milk
Plus:
- Chocolate buttercream, see below
- Several squares of dark chocolate
- Fresh edible flowers
- A 90g bag of sugar coated mini egg.
* Always use cook’s measuring spoons for raising agents
 You will need an 18cm (7 inch) loose bottomed cake tin
Plus:
-
An empty well washed
- 155g pilchard can, label removed
- Sufficient ceramic baking beans to almost fill the pilchard can
Preheat oven to (160C fan ovens) or equivalent.
Whiz the butter and sugar together until light and fluffy.
Add the raising agents to the weighed flour and cocoa and sieve half over the butter and sugar mixture covering it completely. Add the eggs and sieve the rest of the flour over the top.
Whiz to combine. Add the milk and whiz until smooth and glossy.
Grease the cake tin and around the outside of the pilchard can.
Position the can in the middle of the cake tin and fill not quite to the top with the baking beans.
 Pour the cake mix carefully into the prepared cake tin and around the central pilchard can.
Bake for 25-30 minutes or until risen and a skewer inserted comes out clean.
Cool in the tin. Remove the side of the cake tin first, then the bottom. Remove the pilchard can last of all with a gentle twisting action.
-
150g (5oz) sieved icing sugar
- 25g (1oz) cocoa powder
- 75g (3oz) salted butter, softened
- ½ teaspoon vanilla extract
- 1-2 tablespoons milk to mix
Whiz the combined icing sugar and cocoa in the clean dry food processor bowl.
Add the butter and whiz until combined. Add the milk and vanilla extract and whiz until smooth and glossy.
Cover the cake with the chocolate buttercream. Grate over the dark chocolate.
 Pile the mini eggs into the centre. Position the flowers just before serving.
It looks great when it’s cut into: with a central column of mini eggs. Unfortunately, I am unable to show you a photo of this as once it was cut into the whole cake disappeared at a rate of knots before I had a chance to get my camera out.
 I mentioned these over in January’s Garden Blog. Completely irresistible, they contain good-for-you beetroot and dark chocolate. Honestly, they are practically a health supplement!
The beetroot’s naturally sweet, earthy taste enhances the chocolate beautifully, yet without any hint whatsoever of a vegetable nature.
A food processor makes mixing quick and easy. As with any brownies, don’t over-bake so they stay deliciously moist and squidgy.
First bake your beetroot . . . .
Take 225g fresh, unpeeled raw beetroot: choosing similar size globes.
Clean and trim leaves and roots: not too closely as beetroot will ‘bleed’.
Roast in a foil-covered ovenproof dish, at 180C (fan oven or equivalent) for 1-1½ hours until tender.
Peel whilst hot: hold in place with a dinner fork and peel with a sharp knife. Chop roughly.

Cuts into 16 squares
- 175g prepared beetroot (see above)
- 175g soft dark brown sugar
- 110g salted butter, softened
- 150g plain flour
- 25g cocoa powder
- 1 level teaspoon bicarbonate of soda
- 2 level teaspoons cream of tartar
- 3 medium eggs, lightly beaten
- 1 teaspoon vanilla extract
- 75g 70% dark chocolate chopped into roughly ½ cm pieces
Preheat oven to 160C (fan oven) or equivalent
You will need a greased 20cm square brownie tin lined with a piece of greaseproof paper cut to fit the bottom
Tip sugar into processor bowl; add beetroot, whiz until smooth.
Add butter to beetroot mix, whiz to combine (don’t worry if it looks a little strange at this stage).
Add raising agents to flour and cocoa.
Sieve half flour/cocoa over the mixture. Add eggs and vanilla.
Sieve in remaining flour/cocoa. Whiz again.
(Stop the machine a couple of times and scrape the mixture down from the sides with a flexible spatula.)
Once fully mixed, add chopped chocolate: give a single quick whiz to combine.
Pour mixture into prepared tin, easing it into the corners.
Bake for 20-25 minutes until a skewer inserted still shows faint traces of mixture.
Cool in the tin.
This simplified version of American-style ‘boiled’ chocolate fudge frosting sets the brownies off a treat.
110g granulated sugar
40g salted butter
40ml semi-skimmed milk
90g 70% dark chocolate, chopped
Combine sugar, butter, and milk in a small heavy bottomed saucepan.
Bring to boil stirring constantly. Boil for 30 seconds, still stirring.
Remove from heat and add chocolate. Stir until melted.
The moment the chocolate has melted, pour frosting over cooled brownies and, working as quickly as possible, smooth in place and into corners with a flexible spatula.
Do not disturb further at all until the frosting has set. Then, mark carefully into squares.
Doubling up on frosting
Incidentally, if you ever need to double frosting quantities for a double batch of brownies or to frost a large cake, boil for 1 minute.
 Vegetarian, Vegan, Dairy-Free, Potentially Gluten-Free and Nut-Free with no Added Fat or Sugar
And you can’t get much more virtuous than that!
This recipe appeared in Cooking with Mrs Simkins published in January 2010 so I must have 'invented' it and sent it to the Blackmore Vale Magazine in early 2009. I’ve made it regularly ever since and particularly at this time of year: you don’t want to over-indulge so soon after Christmas but you feel in need of a bit of something. Well, I do anyway!
Recently, I’ve given it a bit of a makeover so now it’s possibly even more virtuous than before but still as delicious as ever.
Perfect for this time of year, the cake has no added fat or sugar and is a real pick-me-up with a nice hot cup of tea if you are feeling a bit feeble. Don’t skimp on the cinnamon as that’s one of the ingredients that make it feel so reviving.*
I’ve worked out some extra allergy friendly versions as well.
Vegetarian, Vegan, Dairy-Free, Potentially Gluten-Free
The recipe is a useful one in that it is suitable for vegetarian, vegan and non-dairy diets. It also works well with gluten free flour.
Nut Allergy Note
You can make the cake with ground almonds or desiccated coconut: the 2 versions are subtly different but both good. Coconut allergies are comparatively rare so the coconut version may be suitable for some people with nut allergies but always check individual cases. If coconut is not suitable, try substituting oatmeal.
-
150ml freshly made hot tea: an everyday Indian brew or Earl Grey
- 225g dried stoned dates, chopped
- 175g raisins or sultanas (or a mixture)
- 75g plain flour (or gluten free flour)
- 3 level teaspoons baking powder (most are naturally gluten-free but check the label if it’s an issue)
- 75g wholemeal flour (or buckwheat flour for GF)
- 2-3 teaspoons cinnamon
- 50g ground almonds or desiccated coconut
- 175g ready-to-eat dried apricot, chopped
- 225g grated dessert apple
Pour the tea over the dates, raisins and sultanas in a roomy saucepan, bring to the boil and simmer for 5 minutes. Stir frequently.
Take the pan off the heat and cover with a close fitting lid to retain the flavour and moisture. Leave to cool.
Preheat oven to 160C (fan oven) or equivalent
Grease a round loose bottomed 20cm cake tin (or a silicone cake mould)
Once the mixture is cool, add the baking powder to the plain flour and sieve over the top, (you can do this in the saucepan and save yourself some washing up). Stir thoroughly.
Add the wholemeal flour and cinnamon and stir to combine. Stir in the ground almonds or desiccated coconut and chopped apricots.
Add the apple and mix everything together thoroughly. The mixture will look a bit sludgy but don’t worry; the fruit will meld the unpromising-looking mix together in the heat of the oven.
Spoon into the prepared tin, smoothing the top with the back of a moistened tablespoon. Bake for approximately  40 minutes or until a skewer inserted comes out clean.
Leave in the tin for a few moments to settle before transferring to a cooling rack.
Eat warm or cold. It’s even good served as a pudding: warm with custard (steady!) or thick yoghurt. Once cold, wrap in greaseproof paper and store in an airtight tin, for up to a week.
*Incidentally, you may be interested to know that apparently, cinnamon can help relieve a blocked nose, ease muscle and joint pain and kill certain types of bacteria. There you are you see: this cake is practically medicine!
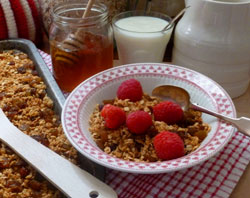
 Just a quick post following on from the granola bars in the last one: a scrumptious granola cereal. It’s gorgeous with cold milk for breakfast (or any time at all, really) or try it on top of yoghurt. Some soft fruit wouldn’t go amiss either.
Store in an airtight jar.
It’s also irresistible straight from the jar – or before it even gets in the jar – so be warned.
Makes 6-8 servings
-
4 tablespoons runny honey
- 2 tablespoons of mild oil, such as vegetable, rapeseed or sunflower
- ½ teaspoon vanilla extract
- 225g (8oz) porridge oats
- 110g-175g (4-6oz) sultanas
- 1 tablespoon golden linseeds
Preheat the oven to 150C (fan oven) or equivalent. You will need a large greased baking tray
Warm the honey, either on the hob, or for 10-20 seconds on High in the microwave.
Stir the oil and vanilla into the warmed honey.
Stir the honey mixture into the oats using two metal spoons until they are all coated.
Spread over the prepared tray and bake for approximately 12- 15 minutes, until the oats are pale (not at all dark) golden and toasted. Turn and stir the oats a couple of times during baking with a fish slice, breaking up any large clumps.
Turn the toasted oats into a large heatproof bowl and stir in the raisins and linseeds.
Mix together and leave to cool. Return to the tray and spread out for more efficient cooling. Once cold, store in an airtight container.
Note
It’s absolutely crucial the oats shouldn’t be over cooked or they will be hard and bitter rather than deliciously chewy and crunchy.
There’s a lot of confusion between flapjacks and granola bars, not least because in America flapjacks is another name for pancakes, also sometimes known as hot cakes. Of course, we would call American pancakes ‘Scotch pancakes’ or even ‘drop scones’ but that’s another story. Oh, and Americans call our scones ‘biscuits’ and that’s yet another story . . . .
Basically though, granola cereal and granola bars are made with toasted oats: that’s the crucial thing, the oats in a granola bar are toasted, in a flapjack, they’re not.
The combination of toasted oats, pure butter and vanilla give these particular granola bars a very more-ish flavour. Full of good things, they are quite substantial and make a great portable lunch.
Quite a few years ago, as a younger person with a lighting fast metabolism, I would take a hefty slice of granola bar to work virtually every day and eat it with slices of cheese and an apple for lunch.
You can do that too if you have a very active life-style! Otherwise, you might prefer to have a smaller piece with a cup of tea or coffee as a treat or take some with you on a bracing country walk.
1. Make a half quantity
A small - 23x14cm (9x5½ inches) - ceramic baking dish makes a handy baking tin for a half quantity of either version.
Unlike the flapjack mixture (see previous post) the granola bar mix is a bit too sticky for the unlined and refrigeration treatment, so line the bottom with greaseproof paper.
Leave the baked granola bars to to cool in the dish and mark into pieces whilst still warm.
Bake for 15-20 minutes as before.
2. Measuring honey & syrup easily
Swirl a tiny amount of cooking oil round your tablespoon before measuring the honey: it will then just slip off the spoon.
 This is the original raisin and walnut version: going back a few years but still wonderful.
Make 10-12 bars
-
350g (12oz) porridge oats
- 50g (2oz) walnuts, chopped
- 250g (9oz) salted butter
- 175g (6oz) Demerara sugar (or use soft brown)
- 6 tablespoons runny honey
- 175g (6oz) raisins
- 2 small-medium eggs
- ¾ teaspoon vanilla extract
You will need a greased 20cm (8 inch) square brownie tin: line the bottom with greaseproof paper or similar – turn the tin over and draw round it to ensure a good fit. Press the paper into the greased tin, smoothing it into the corners.
Preheat oven to 160C (fan ovens) or equivalent
Put the oats into a large, ungreased, dry frying pan and cook over a medium heat, stirring constantly with a wooden spoon, until they are pale golden brown. You may need to do this in 2 batches.
Add the walnuts to the pan halfway through to toast as well.
(Alternatively, toast the oats in the oven on a moderate setting until pale golden brown, adding the nuts halfway as before.)
Put the sugar, honey, and butter into a saucepan and cook over a medium heat until the butter has melted and the sugar has lost its grittiness.  Add the raisins towards the end to plump up a little.
Stir the oats and nuts into the melted mixture and cool slightly.
Lightly beat the egg and stir in the vanilla extract.
Stir into the oat mix.
Press into the prepared tin, smoothing the top with the back of a metal spoon – it helps if the spoon is wet.
Bake for 15- 20 minutes or until pale golden.
Cool the tin: mark into pieces whilst still warm.
Store in a sealed container: ideally in the fridge.
This updated ‘coffee-shop inspired’ version looks especially good with the contrasting red cranberries, green pumpkin seeds and green tinged pistachios and it tastes fantastic (the pistachios are irresistible) but customise your own version if you like. You can vary the mix depending on what’s in the cupboard and what you fancy.
Test the pistachios first – you can’t be too careful as all nuts are full of oils and can go rancid quickly, tainting the whole granola batch.
Make 10-12 bars
-
350g (8oz) porridge oats
- 175g (6oz) cranberries
- 50g (2oz) pistachio kernels cut in halves
- 25g (1oz) pumpkin seeds
- 250g (9oz) salted butter
- 175g (6oz) soft brown sugar
- 4 tablespoons runny honey
- 2 small-medium eggs
- ¾ teaspoon vanilla extract
You will need a greased 20cm (8 inch) square brownie tin: line the bottom with greaseproof paper or similar – turn the tin over and draw round it to ensure a good fit. Press the paper into the greased tin, smoothing it into the corners.
(Test the pistachios again, to make doubly sure.)
Put the oats into a large, ungreased, dry frying pan and cook over a medium heat, stirring constantly with a wooden spoon, until they are pale golden brown. You may need to do this in 2 batches.
(Try the pistachios again at this point, you may as well. Go on, have 2 or 3!)
 Add the pistachios and pumpkin seeds to the pan halfway through to toast as well.
Alternatively, toast the oats in the oven on a moderate setting until pale golden brown, adding the nuts halfway as before.
Put the sugar, honey, and butter into a saucepan and cook over a medium heat until the butter has melted and the sugar has lost its grittiness. Add the raisins towards the end to plump up a little.
(Are you sure those pistachios are OK? Maybe you should try a couple now they are toasted?)
Stir the oats and nuts into the melted mixture and cool slightly.
Lightly beat the egg and stir in the vanilla extract.
Stir into the oat mix.
Press into the prepared tin, smoothing the top with the back of a metal spoon – it helps if the spoon is wet.
Bake for 15- 20 minutes or until pale golden.
Cool the tin: mark into pieces whilst still warm.
Store in a sealed container: ideally in the fridge.
 Incidentally, if you’ve only bought a small bag of pistachios, you should probably eat the rest now whilst you are waiting for the granola bars to bake – as we know, they won’t keep long! And they are full of nutrients. . . .
 High in energy (well, OK, calories, but good calories) flapjacks contain plenty of wholesome ingredients and are always welcome in a lunch box or on the tea table. Here’s a useful simple basic recipe with only three ingredients: butter, syrup and oats: lovely as it is or customised with dried fruit, nuts and seeds; and so on.
Tips for perfect flapjacks
It’s worth spending time smoothing the mixture in the tin with the back of a wet tablespoon so the finished flapjacks are firm and don’t collapse into a heap of crumbs.
An 8 inch (20cm) square glass or ceramic baking dish makes a fantastically efficient baking tin. The same size as a regular brownie tin, it doesn’t need lining: grease it lightly, and once completely cold, the whole baked flapjack will just slide out with the help of a small flexible palette knife. It’s easier to clean too. Much easier.See below for more details.
Whereas professional measuring spoons are pretty much essential for most baking recipes, an ordinary tablespoon from the kitchen drawer measures syrup perfectly for flapjacks.
Imperial measurements are handy for remembering recipes you do often, in this case: 6-6-14 (6oz butter, 6 tablespoons golden syrup, 14oz oats).
All flapjacks below cut into 8 generous slices or triangles or 16 small squares
-
175g (6oz) salted butter, diced
- 6 tablespoons golden syrup
- 400g (14oz) porridge oats
Preheat oven to 160C (fan ovens) gas mark 3 or equivalent
You will need a greased 8 inch (20cm) square baking dish (or greased and lined brownie tin)
Melt butter and golden syrup over a moderate heat. Stir in oats in batches, mixing thoroughly to ensure they are fully coated with the syrup mixture. Press into prepared tin or dish, smoothing down well.
Bake for 15-20 minutes until pale golden. Remove from oven and leave to settle and firm for around 10 minutes.
If using a glass or ceramic dish, cool, then refrigerate until cold, covered with foil, then turn out the whole thing, using a small flexible palette knife to loosen all sides and get underneath, and cut into pieces. If using a tin, mark into pieces in the tin whilst warm.
Store in an airtight tin when completely cold.
Coat plain or fruited flapjacks with 200g of melted 70% dark chocolate*: gently stir 25g (1oz) soft butter into the chocolate when almost melted.
 Prepare as main recipe but swap half the oats for unsweetened muesli.
You could also swap 2 tablespoons of the golden syrup for clear honey: melt butter and syrup together, remove pan from heat, stir in honey then oats and muesli.
It’s best not to use all honey: it doesn’t bind as efficiently as golden syrup
Prepare as main recipe and add 110g (4oz) ready to eat apricots, cut into 6-8 pieces.
You can add a few raisins or dried cranberries to the basic mix without affecting the quantity of oats but if including chopped nuts or seeds, add a measured 50g (2oz) and reduce the oats by the same amount. Add the extras first and then the oats – you will be able to tell if the mixture ‘feels right’ and contains enough oats – it should be fairly stiff but not so stiff that the finished flapjack crumbles into dry pieces.
Chocolate chips are gorgeous in flapjacks: let the oat mixture cool down first then stir them in. Smooth the top as usual and bake. Dark chocolate chips work particularly well against the rich buttery flapjack mixture.
A chocolate chip and dried fruit combination is good: try dark chocolate chips with cranberries, about 50g of each. Add dried fruit whilst the oat mixture is still hot to allow for greater plumping up.
 The quantity of oats is reduced to accommodate a generous amount of figs and walnuts.
-
175g (6oz) butter, diced
- 6 tablespoons golden syrup
- 175g (6oz) dried figs, stalks removed, each cut into
- 6-8 pieces
- 50g (2oz) walnuts, broken into pieces
- 285g (10oz) porridge oats
Method as before.
Break the chocolate into pieces by tapping it smartly all over, still in its foil wrapper, with the end of a rolling pin or something similar.
Tip into a microwaveable bowl and microwave on High, in 30 second bursts: it will take a couple of minutes or so in all. Try tilting the bowl from side to side a few times in between bursts rather than stirring and agitating the chocolate too much.
 Cut the butter into small pieces and stir gently into the chocolate towards the end of the melting time.
Alternatively, melt the chocolate in a bowl over a pan of barely simmering water: choose a bowl that will fit comfortably in the top of the saucepan but without the bottom touching the hot water.
What is the difference between a flapjack and a granola bar?
 Sun-shiny early autumn days are here again: already apples are appearing in boxes outside garden gates with friendly hand written notices inviting you to help yourself. Apparently, this summer’s weather conditions have contributed to bumper crops of just about everything ‘from berries to barley’ as one paper put it. Orchards were badly affected earlier in the year by some serious hailstorms - with stones the size of peas in some cases - but pulled through to produce a very decent harvest.
 Three Tips for the Perfect Apple Cake
-
Always use the exact amount of apple as stated in the recipe. Don’t add more ‘for luck’ to ‘make it nice’ or to ‘use up’ an extra bit of apple. Extra apple in the mix will make the cake too damp and heavy – or ‘sad’ as we used to say in Lincolnshire.
-
Always make sure the cake is completely cold before storing in a tin. Otherwise the cake will become wet with condensation and can start to go mouldy.
-
Windfall apples are fine to use if you plan to eat the cake immediately. A cake made with windfalls won’t keep long before the apple starts to ferment: that’s why windfalls are so brilliant for cider!
 This moist apple cake is simple to put together and tastes fabulous: the caramel flavoured buttercream is just blissful: salted butter gives exactly the right hint of salt without it being overpowering.
Popping candy looks pretty scattered over the top and gives a crunchy element of contrast plus an unexpected surprise. Add it right at the last moment to make sure it retains its pop.
What Makes Popping Candy Pop?
As you probably know, tiny bubbles of carbon dioxide are trapped in the candy and explode when it gets wet: the idea being, it explodes in your mouth, but moisture from butter icing will release the gases prematurely if the candy is left on the cake for too long before eating.
A food processor makes everything quick and easy but you can make the cake by hand if you prefer.
Serves 8
-
110g (4oz) softened butter
- 110g (4oz) caster sugar: golden or unrefined works well
- 175g (6oz) plain flour
- 1 level teaspoon bicarbonate of soda
- 2 level teaspoons cream of tartar
- 2 large eggs
- ½ teaspoon vanilla extract
 50g (2oz) ground almonds
- 175g (6oz) finely chopped and peeled apple
- Plus: an additional 50g (2oz) diced and peeled apple
Preheat oven to 160C (fan oven) or equivalent
You will need a greased 18cm (7 inch) loose bottomed cake tin
Whiz the butter and sugar together in a food processor. Add the raising agents to the weighed flour and sieve half over the mixture. Add the eggs and vanilla and sieve the rest of the flour and raising agents over the top. Whiz to combine.
Add the ground almonds and the larger amount of chopped apple. Whiz until smooth and glossy: stop the machine and scrape the mixture down from the sides of the bowl with a flexible spatula a couple of times.
Remove the blade from your processor, scrape any mixture back into the bowl and stir in the smaller amount of diced apple.
Pour the mixture into the prepared tin bake for 40-45 minutes, or until risen and golden and a skewer inserted comes out clean.
 Allow to settle in the tin for 10 minutes or so then remove and finish cooling on a wire rack.
Caramel Icing
-
75g salted butter, softened
- 3 tablespoons dulce de leche or similar caramel spread
- ¼ teaspoon vanilla extract
- 50g icing sugar
- Golden popping candy to finish
Beat the caramel into the butter with a wooden spoon and stir in the vanilla. Sieve the icing sugar in gradually, stirring to combine. Beat until smooth. Set aside in a cool place.
Once the cake is cool, swirl the icing over the top. Just before serving, scatter with popping candy.
 If you love apple cake, you never tire of Dorset Apple Cake. Easy and gorgeous, you can eat it warm or cold: plenty of clotted cream is highly recommended.
-
225g (8oz) plain flour
- 1½ teaspoons baking powder
- 110g (4oz) butter
- 110g (4oz) golden granulated sugar, plus extra for finishing
- 225g (8oz) of peeled, cored, apples, finely chopped (cooking, eating or a mixture of both)
- 75g (3oz) sultanas or raisins
- 2 large eggs, beaten
You will need a greased loose bottomed 20cm (8 inch cake tin)
Preheat oven to 160C (fan ovens) or equivalent
Sieve the flour and baking powder into a bowl and rub in the butter. Stir in the sugar, dried fruit and apple. Mix in the eggs. Turn into the prepared tin and smooth the top with the back of a metal spoon: a wet spoon makes it easier.  Sprinkle some more sugar over the top. Bake in a preheated oven for approximately 40-45 minutes or until golden and a skewer inserted comes out clean.
Leave in the tin for a few moments, then remove and cool on a wire rack. Cool completely before storing in an airtight container.
 As the war dragged on into 1918, supplies were badly affected and rationing was introduced. 'The Win-the-War Cookery Book', published in 1918, priced 2d, rallied failing morale on the home front with the message:
'Women of Britain … Our soldiers are beating the Germans on land. Our sailors are beating them on the sea. You can beat them in the larder and the kitchen.'
Homemade cakes, warm socks and other comforts were lifelines for the troops. Parcel post got to France or Belgium in 2-3 days, but could take 10 days to the front line.
 This modest cake is adapted from a recipe, by renowned cookery writer Elizabeth Craig, for something economical to parcel up and send to the troops. It’s moister than the original (which can sometimes turn out a little on the dry side) doubling up on milk quantity, but it’s not as suitable for posting overseas.
Tip
A square ceramic or Pyrex oven dish – such as a lasagne dish – makes a brilliant cake tin. There’s no need to line it: cakes just slide out with only a light greasing. The sides of the cake are less likely to catch and burn and it’s much easier to clean afterwards.
-
110g butter
225g plain flour
- Pinch salt
- 2 teaspoons cocoa
- 75g soft dark brown sugar
- 75g raisins
- ½ teaspoon bicarbonate soda
- 300ml milk
- 1 teaspoon cider vinegar
- ½ teaspoon vanilla extract
 Preheat oven to 150C (fan oven) or equivalent
You will need a greased 23cm square ceramic oven dish.
Cream butter and flour together. Stir in flour, salt, cocoa, sugar and raisins.
Mix bicarbonate of soda milk, vinegar, and vanilla. Stir into the mixture.
Pour into prepared dish. Bake for approximately 40 minutes until firm but springy to touch and a skewer inserted comes out clean. Bush top and sides with butter whilst warm.
Allow to settle before turning out onto a wire rack to cool. For best results eat within 2 days.
 Across the other side of the Empire, in Australia and New Zealand, delicious energy-giving biscuits, named in honour of the Australian and New Zealand Army Corps, were baked and sent to the troops in Gallipoli.
Here is a version of those biscuits, prepared with slightly different proportions, giving more of a softer cookie consistency.
Makes approximately 18
-
85g porridge oats
- 85g desiccated coconut
- 110g plain flour
- 110g caster sugar
- 110g butter
- 1 tablespoon golden syrup
- 1 level teaspoon bicarbonate of soda
- 2 tablespoons boiling water
Preheat oven to 180C (fan oven) gas mark 4 or equivalent
You will need 2 large greased baking trays
Combine the oats, coconut, flour and sugar. Melt the butter over a moderate heat with the syrup.
Add the bicarbonate of soda to the boiling water and stir into the butter and syrup.
Make a well in the middle of the dry ingredients, pour in the wet mix and stir to combine.
Space out dessertspoonfuls of the mixture onto the prepared trays giving them sufficient room to spread out as they cook.
Bake for 5-8 minutes until golden. Allow to settle on the tray for a moment and transfer to a wire rack to cool using a palette knife.
Once cold, eat immediately or wrap closely in foil and store in an airtight tin for a couple of days.
You can hardly believe it now, knowing what we do, but at the very start of WW1, young men flocked to join the army. Teenagers from rural areas were particularly keen: everyone thought the war would be a brief affair, over before Christmas, and soldiering was a way for a young man to better himself and get on in the world.
Instead of scraping a living on the land with the women, a country chap could earn seven shillings a week on army pay – and – if he sent half of it home to his mother, the government would send her another 3/6d. Bearing in mind, his father was probably earning only 13 shillings a week as a farm labourer; you can see how attractive it would be.
Added to that, three square meals a day, a warm uniform and boots, a laugh with your mates, tales to impress the girls and maybe one day tell your children and grandchildren: obviously, it would be a complete no brainer, as we say today.
On the kitchen front, after initial frenzied panic-buying at the very start of the war, the British public settled into a routine of voluntary frugality. Economy was encouraged but there were no genuine shortages until late 1916 when the German U-boat blockades began.
 Economical seasonal fruit Bettys were popular WW1 puddings. You can just imagine a poor, beleaguered cottager, scraping together the makings of a lovely treat to give her son before he left home to take the King’s Shilling: a few windfall apples, blackberries from the hedgerow, a few stale breadcrumbs and you’ve got an appetising pudding.
Dry the bread first in a low oven for tasty crispy crumbs: for us, now, in our modern kitchens, a food processor makes short work of the topping.
Cut 500g peeled, cored Bramley apples into even size chunks. Cook gently with 3 tablespoons water and 50g granulated sugar for 5 minutes or until just tender. Add 150-200g blackberries and cook for another 3-5 minutes until juices run. Strain off juice. Transfer fruit to a 23cm pie plate.
Whizz 100g dry bread into crumbs in a processor. Add 50g granulated sugar, ¼ teaspoon cinnamon and 40g melted butter. Whizz together. Pile onto fruit. Bake at 180C (fan oven) or equivalent for 10 minutes until crisp and golden. Serves 4 with cream, custard or yoghurt.
 Try replacing the bread with oatcakes, broken into pieces and whizzed into crumbs: possibly even more delicious and very, very easy. It’s gorgeous with yoghurt and any leftovers make a brilliant breakfast treat.
 This is adapted from a trench kitchen recipe: what a welcome treat it must have been for the men.
Baking caramelises the sweetened milk, turning the mix into a moist and light-textured pudding with a crispy chewy top. When it’s ready it looks and smells like Christmas cake.
Leave a minimum 1 inch of space around the top of the dish: the mixture will rise significantly during baking.
Serves 6-8
-
200g digestive biscuits
- 110g mixed dried fruit and peel
- 2x 370g tins condensed milk
You will need a 1½ litre baking dish
Crush the biscuits finely. Combine with the fruit and peel in the baking dish. Pour over the condensed milk and stir thoroughly. Soak for 3 hours.
Bake in a low preheated oven: 150C (fan oven) or equivalent for 1¼ hours until brown on top and moist underneath.
 This economical ground rice version of Bakewell tarts, popular at the coronation of George V in 1911, remained a favourite during WW1.
Makes 18 tarts
-
225g plain flour
- Pinch salt
- 110g cold butter, diced
- 3 tablespoons cold water
Plus:
- 110g ground rice
- 110g caster sugar
- 50g softened butter
- 1 medium egg
- ½ teaspoon almond essence (alternatively, vanilla works beautifully)
Seedless raspberry jam
You will need 2 x greased 12 cup bun tins (rather than smaller tart tins) and a 7½ cm fluted cutter
Preheat oven to180C (fan oven) gas mark 4 or equivalent
Rub butter into flour and salt. Stir in water. Knead gently into a ball. Roll out to thickness of a pound coin.
Cut out and position in tins.
Cream butter with sugar and ground rice. Stir in egg and essence.
Dab ½ teaspoon jam into each tart and top with 1½ teaspoons of filling, smoothing round edges.
Bake for 10-15 minutes until golden. Transfer to a wire rack to cool.
 Some of us can dimly remember salads from our childhood which often included a mayonnaise-y vegetable mixture in a tin. Dinky little uniform cubes of firm potato, carrot and peas were mixed with a mayonnaise-style dressing.
You can’t get it now but for something similar with a few tasty extras, more like a Russian salad, cut peeled waxy potatoes into small even dice and boil for 4-5 minutes until only just tender. Drain and plunge into cold water. Drain again and pat dry.
Cook a similar amount of mixed frozen peas, green beans, sweet corn and carrot batons for 3-4 minutes. Drain and plunge into cold water. Drain and dry as before. Combine with the potatoes and mix with mayonnaise and a tiny splash of cider vinegar. Finish with sliced cornichons or baby gherkins.
For an even more nostalgic tribute, try using salad cream instead of mayonnaise and cider vinegar.
If you are a regular visitor to the British coast during the summer holidays, particularly those frequented by surfers, you may have come across ‘Surfer’s Chips’ in the local beach café. This high energy snack is both delicious and easy on the pocket, and is simply chips topped with sliced onion and grated Cheddar cheese.
You can recreate this easily at home and relive some of those carefree days on the beach. Cafés usually serve the onion raw but cooked onion is sweeter and gentler.
Pop some decent quality oven chips in the oven. Five minutes after the start of cooking time remove from the oven and top with thinly sliced rings of onion – red onion works best. Return to the oven and finish cooking. Once cooked and still piping hot, scatter immediately with grated cheese.
Proceed as before but leave out the cheese and serve the oniony chips with mayonnaise and salad.
Make a ‘beach buttie’ – sandwich either of the chip versions in a bap – go on, you know you want to!
Tip
Cheesy chips are brilliant served with chilli as a change from rice. Scatter the chips with a few sliced chillies for the last five minutes of cooking time as well if you like.
 Hot water pastry is surprising straightforward to make, in fact, you can hardly believe just how easy, prompting the question: “why on earth have I never made this before?”
The ingredients: fat, flour and water, are the same as for shortcrust, but in different proportions, and are simply stirred together hot instead of rubbed together cold.
The resulting paste, almost exactly the texture of play doh (but smells better and doesn’t wreck the carpets) is fun to work with and very easy going – any inadvertent tears can soon be patched up. Make sure you use it whilst it’s still warm: it will start to crumble as it cools.
Once the boiling fat part is out of the way, (and only when that’s out of the way, obviously!) hot water pastry is a great holiday activity to do with children: try making the Cowboy Pie for lunch or supper.
 This colourful layered pie filled with summer vegetables, looks a bit challenging, but is fairly straightforward. It’s perfect for picnics and celebrations.
Gelatine adds moisture and ensures the pie cuts beautifully. A few pastry shapes arranged on top sets it all off beautifully.
Serves 4-8
Filling
-
3 large red onions, thickly sliced
- 1 red pepper & 1 yellow pepper, sliced
- 2 tablespoons oil
- 450g waxy new potatoes, scrubbed or peeled
- 125g carrots
- 125g butternut squash
- 50g baby spinach leaves
- Black pepper
- Finely chopped celery leaves, thyme & marjoram or oregano
Hot Water Crust Pastry
-
350g plain flour
- ½ teaspoon salt
- ½ teaspoon ground white pepper
- 100g lard or vegetable shortening, diced
- 135ml water
- 1 small egg beaten with a teaspoon of water
Savoury Jelly
-
Plus: sufficient powdered gelatine (or leaf or vegetarian gelatine) to make ½ pint savoury jelly
- Pinch salt
You will need a greased 18cm loose bottomed cake tin, baking tray & decorative cutter
Pre-heat oven to 180°C (fan oven) or equivalent
Preparing the Filling
Slow-fry onions in 1 tablespoon oil, until soft and melting. Soften peppers separately in 1 tablespoon oil.
Slice potatoes into 1cm rounds. Boil for 15 minutes until just tender. Drain. Cut carrots into ½ cm circles. Cut squash into 1cm cubes. Boil together for 20 minutes until just tender. Drain. Reserve cooking water.
Making the Pastry
Heat fat and water together in a small saucepan until fat has melted. Bring to the boil.
Sieve dry ingredients into a roomy bowl. Make a well in the centre. Pour in the hot fat and water. Combine with a wooden spoon. Transfer to a board. Work into a pliable dough.
Remove ¼ for the lid. Lightly flour the board and roll the rest into a circle approximately ½ cm thick and 30cm in diameter.
Roll round the pin and transfer to the prepared tin. Manoeuvre gently into position. Use offcuts to repair any tears. Roll out lid, making a central hole. Use remaining offcuts for decorative shapes.
Adding the Filling, Positioning Lid, Glazing & Baking
Add filling in distinct layers, starting with one of potatoes. Scatter herbs and pepper throughout layers. Brush pastry edges with egg-wash and position lid. Crimp together. Position decorations: use egg-wash to fix into position. Brush entire lid with egg-wash. Bake for 1 hour until golden brown. Leave to cool.
Adding Jelly & Leaving to Set
Bring reserved cooking water to boil with salt and add gelatine according to maker’s instructions. Pour gradually through a funnel into the lid hole of the cold pie. Leave in the tin and refrigerate overnight.
 Here’s a filling and fun holiday supper from just a few homely ingredients.
Serves 4-6
Hot Water Crust Pastry
-
350g plain flour
- ½ teaspoon salt
- ½ teaspoon ground white pepper
- 100g lard or vegetable shortening, diced
- 135ml water
- 1 small egg beaten with a teaspoon of water
Filling
-
450g peeled or scrubbed waxy new potatoes; sliced and boiled until tender
- 900g thickly sliced slow-fried onions
- 2 x 400g cans baked beans in tomato sauce.
You will need a greased 18cm loose bottomed cake tin, baking tray & decorative cutter
Pre-heat oven to 180°C (fan oven) or equivalent
Heat fat and water together in a small saucepan until fat has melted. Bring to the boil.
Sieve dry ingredients into a roomy bowl. Make a well in the centre. Pour in the hot fat and water. Combine with a wooden spoon. Transfer to a board. Work into a pliable dough.
Remove ¼ for the lid. Lightly flour the board and roll the rest into a circle approximately ½ cm thick and 30cm in diameter.
Roll round the pin and transfer to the prepared tin. Manoeuvre gently into position. Use offcuts to repair any tears. Add filling in layers as before. Roll out lid, making a central hole. Use remaining offcuts for decorative shapes.
 Cool slightly before eating: the beans will be very hot.
Make as before but mix a sliced chilli, fried until soft in a little oil, into the beans

Despite all the rumours flying round, we hope dear old Mr Kipling hasn’t advertised his last exceedingly good cake.
These ‘Mr Kipling Tribute’ iced Bakewell tarts are perfect for tea in the garden or picnics: and all the better for being homemade. And if the rain does start to fall whilst you are out and about; you can always cheer yourselves up with a ‘car picnic’ in the time-honoured British tradition.
A food processor will make short work of the pastry, frangipane and even the icing but prepare everything by hand if you prefer.
 Use bun tins rather than the smaller standard tart tins for these generous tarts.
Makes approximately 18 tarts
Pastry:
-
8oz (220g) plain flour
- Pinch salt
- 4oz (110g) cold butter, diced
- 3 tablespoons cold water
Almond filling or frangipane:
-
4oz (110g) ground almonds 4oz (110g) caster sugar 2oz (50g) butter
- 1 large egg, beaten
- ½ teaspoon almond essence
Plus
- 8-9 teaspoons raspberry jam, ideally seedless
You will need 2 x greased 12 cup bun tins and a 3 inch (7½ cm) fluted cutter
Preheat oven to 180C (fan oven) gas mark 4 or equivalent
 Whiz the butter, flour and salt together into fine crumbs. Add the water and whizz until large clumps begin to form. Transfer to a lightly floured board and knead gently into a ball. Roll out to a thickness similar to a pound coin.
Cut into rounds and line the prepared tins.
Cream the butter with the sugar and ground almonds. Stir in the egg and almond essence.
Dab barely ½ teaspoon of jam into each tart and top with a teaspoon of the almond filling, smoothing round the edges.
Bake for 10-15 minutes until golden. Transfer to a wire rack to cool.
Glace Icing 
The glycerine gives the icing a nice almost stretchy ‘baker’s shop cake’ quality. If you like plenty of icing, you may want to increase quantities by 50%.
- 225g (8oz) icing sugar
- 3-4 tablespoons lemon juice
- 1½ teaspoons glycerine
- Glace cherries to decorate
Sieve the icing sugar into a bowl and stir in the juice and glycerine gradually. Beat until glossy.
Alternatively, put the icing sugar into the clean, dry, bowl of your food processor and give it a few turns to eliminate any lumps. Add the juice and glycerine and whiz until smooth. Add a drop more juice if necessary.
Spread over the top of each cooled tart and finish with a glace cherry. Store in an airtight tin.
Make as before but omit the almond essence in the frangipane, and add the finely grated zest of 2 lemons instead. Use lemon curd in place of raspberry jam.
Tip
 Try making up some extra icing and piping the tarts with yellow diagonal lines for a professional look. Yellow chocolate beans also work well as a final decorative touch.
Both varieties of tart are, of course, also lovely plain and un-iced.