Welcome to another Mrs Simkins and Miss Windsor collaboration!

Honestly, we just love working together! We had our lovely garden party last summer and we’ve had some exciting Italian escapades and now we’re thinking: why not collaborate on some of our homelier recipes too? After all, it’s what we do most!

Our first recipe is for something we are both fond of, our different versions of hasty pudding: we’ve been calling it our ‘Haste Off’!

So, come on, step inside and make yourself at home with us: we’ll put the kettle on . . . .

Hasty Pudding

Simple, more-ish and comforting, you can’t get much more homely than this traditional British pudding that travelled over to America with the Pilgrim Fathers (or Forefathers, as they were first known). Originally from Nottinghamshire and Lincolnshire the pilgrims set sail for America in 1620 hoping to recreate all their favourite foods when they got there.

As it turned out, as with many of their favourites, the pudding needed a bit of a makeover: wheat flour was scarce so early settlers used cornmeal or ‘Indian corn’ instead and topped it off with a splash of newly discovered maple syrup.

The funny thing is, Hasty pudding, sometimes known as Indian pudding, is now regarded as a great American classic whereas the English version has been more or less forgotten about!

 Miss Windsor and I believe it is well worth a reviving so do read on and try both our equally delicious versions. Let us know what you think.

  • 25g (1oz) butter, diced (plus small extra knob for finishing)
  • 50g (2oz) plain flour
  • 450ml (¾ pint) milk
  • ¼ teaspoon salt (or to taste)
  • 25g (1oz) soft brown sugar (plus extra for serving)
  • 1medium-large egg, beaten 
  • Freshly grated nutmeg

Preheat oven to 160C (fan oven) gas mark 3 or equivalent

You will need a buttered 600ml (1 pint) baking dish

Combine butter, flour, milk and sugar in a heavy-bottomed pan. Heat until just boiling, whisking continuously.

Remove from heat and whisk in egg. Pour into baking dish, dot with a small amount of butter and grate nutmeg over.

Bake for 20 minutes or until golden on top. Serve with a light sprinkling of brown sugar.

For the American Version

Substitute fine cornmeal or polenta for flour and serve with maple syrup and a dab of butter: you may like to reduce the sugar in the pudding by half.

Hands up! Who remembers Creamola?

It’s very odd but whilst I was researching hasty pudding and making some trial versions, I discovered it tastes exactly like my old childhood favourite: Creamola.

Creamola was a wonderfully comforting and subtly flavoured (I can’t quite remember, ground rice or semolina?) pudding that was around years ago. I loved it as a child: in fact I practically lived on it for a few days when I was fourteen. My mum had to go into hospital and whilst Dad was working overtime I kept myself going with Creamola, mugs of tea and toasted Lincolnshire plum bread.

I often have wistful cravings for it but you can’t get it now, I think it was last heard of some time in the early nineties.

Despite not being made from ground rice or semolina, both my hasty puddings taste just like it: so go on Creamola lovers, treat yourselves!

Miss Windsor and I believe it’s a pudding well worth a reviving so do read on and try all our equally delicious hasty puddings. Naturally, my dear friend has taken her beloved Mrs Beeton as her inspiration, so between us we have wheat flour, cornmeal and tapioca versions. Let us know what you think.


Hello again from Miss Windsor! Do join us At Home for our Haste Off!

Hello, darlings!

Welcome to another spiffing collaboration!

My dear culinary amour Mrs Simkins and I had such blast working together last year on our summer garden party and Italian escapades, that we couldn’t wait to get cracking on yet another exciting collaboration – you see, we only have eyes for each other, in a culinary capacity, of course!

So here we are again, rearing to go and full of beans, in readiness to deliver an extraordinary menu of temptingly satisfying old-fashioned recipes – the very best of British fayre, and beyond the borders, if we fancy experimenting with a different type of cuisine. 

Darlings, I must divulge there’s one slight difference with our new collaboration, is that Mrs Simkins and I extend an invitation to all those culinary enthusiasts of yesteryear to join us in our delightful homes, well I mean respective kitchens’, where you’ll learn how to recreate a mouth-watering slice of food history – I say, would you care to accept our invitation?

Miss Windsor X

Mrs Beeton’s Hasty Pudding (Nutmeg & Vanilla Tapioca Pudding)

Hello, darlings!

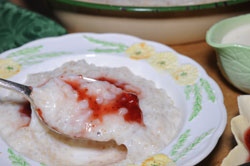
Miss Windsor excitedly presents Mrs Beeton’s Hasty Pudding (Nutmeg & Vanilla Tapioca Pudding).

Okey dokey, Miss Windsor has no time for ‘dilly dallying’, so without further ado I’m going to get straight to the point – chop, chop! about this subtly sweet yet rather wholesome member of the British milk pudding family.

You see, as far as I know, hasty pudding or more commonly known as tapioca pudding has been a staple of our beloved sweet course since the 1800’s – well, a lot less so in today’s modern world, but suffice to say it’s certainly making a glorious comeback!

Oh, and I must quickly mention that I’m ‘chomping at the bit’ as I excitedly present this recipe as my first offering to ‘At Home With Mrs Simkins and Miss Windsor’ – our new collaboration which opens with an all guns blazing HASTE-OFF, hence HASTY PUDDING – comprende?

Darlings, and if you haven’t already guessed, just as it says on the tin we are indeed rustling up a quick-fire pudding that you can recreate in a jiffy, or in a haste in this case – just twenty minutes will do the trick! Created with tapioca (of course!) milk, brown sugar, vanilla flavouring, and nutmeg – the very best of British fayre! In fact, my darling Mrs Simkins opted to make a baked version with flour, milk, brown sugar, butter, egg, and nutmeg – How spiffing! She has also made an American version with cornmeal: what versatility!

Now, moving swiftly on, hasty pudding which was traditionally made with either sago or tapioca and sometimes with oatmeal, has been quite a thing in England since the late sixteenth century. In fact, the Victorians absolutely adored this scrumptious, easy on the purse strings, economical dish which was a rather appreciated delicacy of its time – of course, one would serve this delightful pud with a splash of cream and a dollop of jam – I’m rather fond of Tiptree Strawberry Jam by Wilkin & Sons Ltd. 

So, if you’re a fan of old-fashioned traditional British food such as rice pudding, then you’re going to fall head over heels with this old-school, traditional creamy dessert bestowed the grand title of Mrs Beeton’s Hasty Pudding (Nutmeg & Vanilla Tapioca Pudding) - just like granny used to make! Or I dare say, many of you have wonderful memories of something similar yet equally indulgent which your school cook would whip up to perfection – school dining at its best!

Now, to be brutally honest, when I was a snipper I was rather averse to tapioca pudding, and I used to dread the day it was on the school dinner menu. I couldn’t even bear to blink an eye at it, as it reminded me of a sloppy gooey bowl of white jelly balls that had been torn from the depths of a slippery slimy pond – frogspawn comes to mind!

I must say, my beloved culinary marvel, Mrs Beeton was a huge fan of tapioca, and states in her culinary masterpiece Beeton’s Book of Household Management which was first published in 1861, ‘Its nutritive properties are large, and as a food for persons of delicate digestion, or for children, it is in great estimation’ – well versed, Mrs Beeton! Of course, recipes for hasty pudding, tapioca pudding, tapioca milk-based pudding, plus tapioca soup were given pride of place in her culinary bible.

Darlings, hurry along now; there’s no time to spare, as one must prepare to recreate Mrs Beeton’s Hasty Pudding. However, before you get cracking I’m afraid to say that you’ve been a trifle misled, as you’re going to need a bit longer than twenty minutes; in fact, twelve hours to be precise!

You see, one must soak the tapioca pearls for at least twelve hours in water (some say a couple of hours will do, but don’t listen to them!) in order soften the pearls which will thicken the mixture. Oh, and by the way, do not succumb to the convenience of instant tapioca, the instant type doesn’t work so well, and in any case, Miss Windsor will not tolerate idle hands! 

Oh, dearie me, I expect the news has ‘upset the applecart’, so to speak, but the truth is darlings Mrs Beeton’s recipe is not so hasty at all! I’m afraid there’s nothing Miss Windsor can do about that, as it’s due to the everyday challenges of cooking from the past, even if the recipe is deemed to be quick as a flash; some kind of modernish convenience of yesteryear, I suppose!

Darlings, tick tock, tick tock, hurry along now and put your skates on, and dash off to your kitchen and give your tapioca pearls a jolly good soaking – Ta very muchly! 

See you back here in twelve hours – don’t be late!

Miss Windsor X 

Preparation time: 12 hours to soak the tapioca, plus 10 minutes. Cooking time: 10 to 15 minutes Serves 6 delightful guests! 

  • 220g (1/2 cup) tapioca
  • 1 litre (34 US fl oz.) water
  • 750ml (26 US fl oz.) whole milk
  • 100g (1/2 cup) brown sugar
  • 1 tablespoon vanilla essence

  • Pinch of salt

To Serve: double cream and strawberry jam

Equipage: vintage or decorative serving dish

Method

accept our invitation? 1. First off, soak the tapioca pearls in water for 12 hours – overnight will do the trick!

2. Darlings, now 12 hours have passed its time to wash your grubby little paws in readiness for some culinary action!

3. On a low heat slowly boil together the milk and vanilla essence in a large saucepan.

4. Then gently spoon in the tapioca and stir briskly.

5. Add a pinch of salt and brown sugar, then continue to cook on a low heat for 10 minutes or so until thickened. Stirring constantly.

6. Add a light sprinkling of flour if not thickened enough to your liking!

7. Once your pudding is ready pour into a vintage or decorative serving dish of your choice.

8. Serve immediately to your delightful guests with a splash of cream and a dollop of strawberry jam – voila!

Mrs Simkins says:

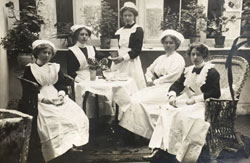
I just love those pretty bowls of Miss Windsor's and happen to know they once belonged to her Aunt, pictured in the photograph above. She's the one in white, second from right.


Welcome to Mrs Simkins and Miss Windsor’s Italian Escapades!

Welcome to another Miss Windsor and Mrs Simkins extravaganza.

We both enjoyed our summer garden party collaboration so much and it had such a warm reception, that we couldn’t resist another mini recipe collection before the summer ends.

Although firmly rooted on British soil for most of the year, Miss Windsor and I both share a love of travel, and this year saw us both jetting overseas on early summer breaks.

Funnily enough, it turned out we were both Italy-bound, there within a couple of weeks of each other: me in Venice and Miss Windsor down south in Naples. Perhaps not so strange when you think of it as we both adore Italian food.

Whilst not exactly swanning around in a gondola, my family and I arrived in style at our palazzo, in a motor boat from the airport, which gave us a fabulous mini-tour of the city and the Grand Canal before we’d even set foot on solid ground.

Although I’d been to Venice before, many years ago as a much younger person, I was still completely over-awed over by all the glorious sights of Venice and couldn’t get over the fact that we were staying in an actual fifteenth century palazzo on the Grand Canal. My children were beside themselves, and even my husband, who had been briefly to Venice on business in fairly recent years, was quietly stunned. 

We had the most wonderful time, three days of strolling through the calles and campos and taking it all in. There was plenty of music as well: even some of the gondolas had opera singers on board: suddenly, amazing voices would erupt from the canals and bounce off the buildings, the singers gliding past and underneath the bridges, taking absolutely no notice of the spectators all agog on the banks and the lines of washing strung above their heads. 

The food was fantastic. We’d try different bars for breakfast: coffees, pastries, fruit and generally gorgeous little things and then go to our usual ristorante, which we’d found on our first morning, for lunch and dinner. It was in a campo very close to our palazzo, with great food and helpful waiters. We felt so at home we kept going back. 

We enjoyed everything we ate there and the service was terrific: we got to know the waiters and they were lovely. I especially loved the thin crust pizzas with vegetable topping, the freshest rocket or ruccola piled on top, a wonderful simple super-fresh lunchtime salad with tuna, rocket, lettuce, olives, and mozzarella and the way the waiter made sure I had all the dressing components easily to hand, the delicious half bottles of Pinot Grigio and Italian light beer, neither of which we’ve been able to track down back at home, my husband’s carbonara which I tried and meant to order for myself but ran out of opportunities and the tiramisu and small evening coffees. Even the grissini seemed extra fresh and crispy.

Everything was completely wonderful and we can’t wait to go again. In the meantime, I’ve recreated a couple of the restaurant dishes: you can share them with me, here’s the first one, below. Ciao!

As Miss Windsor says, a glorious getaway indeed.

Follow Mrs Simkins on Twitter. @MrsSimkinsCooks


Miss Windsor: Bringing Food History Alive and Theatre to Your Table

Hello, darlings!

Welcome to Mrs Simkins and Miss Windsor’s Italian escapades – Mamma Mia!

Now, gather around the table, knives and forks at the ready; parmesan cheese and olive oil to hand; whilst you gracefully wave the Italian flag – How patriotic! I say darlings, now you’re ready to indulge in our irresistible menu of Italian cuisine.

You see, following the success of our sizzling summer garden party, where we whipped up a plethora of teatime treats for our delightful guests and fellow baking enthusiasts. I say before the end was nigh, Mrs Simkins and I were ‘chomping at the bit’ to whet your palate once again with something a trifle different, yet equally as scrumptious – Now, how could one resist a taste of Italy?

Darlings, you may already know that sadly Miss Windsor lives miles away from her darling culinary amour. Yet, funnily enough, our lives seem to run almost concurrently, well I dare say, in our case the operative word being ‘synchronicity’ – How fascinating!

For example, a few months ago following a good ol’ rummage around my local vintage shop, I returned home with a stunning cut-glass butter dish. But would you ‘Adam and Eve it’? My darling Mrs Simkins owns exactly the same vessel – By Jove! wonders never cease.

You see I must divulge, that over in Dorset, virtually to the day, Mrs Simkins strangely enough stumbled across the exact same butter dish in her local charity shop. She was thrilled to bits as it was a replica of her darling mother’s and featured regularly on the childhood tea table – Ooooh, how eerie!

Now, what I’m about to tell you is a rather spooky occurrence in the realm of synchronicity! You see, Mrs Simkins and I were terribly excited about our respective summer holidays’. Yet prior to our departure we’d never exchanged a single word regarding our destinations. Anyway, one day during a jolly old chinwag about our glorious getaways’, we soon realised that we’d both enjoyed a marvellous munch on Italian cuisine – How extraordinary! 

Of course, then the ‘penny dropped’ – we’d both popped off to Italy, where Miss Windsor sampled an assemblage of Nepalese delights – Well, I never! However, one must admit I was rather enamoured by their simple, yet splendidly satisfying Neapolitan pizza for a tiddly 3.50 euros!

Also, darlings, during my travels I became quite partial to the frightfully fabulous Garofalo Casarecce Pasta, which is a product of Gragnano near Naples. 

Oh, and I must express my sheer disappointment regarding one of my most favourite desserts – the enormously tantalising Tiramisu, which I nibbled on during a short jaunt to Pompeii! Well I say, my taste buds were not at all tickled by this classic Italian layered cake. Not only was my experience a soggy one due to the unrelenting heat that affected the creamy layer. But I was also subjected to only a faint whiff of coffee; followed by the culinary crime of NO liquor – Oh, dearie me what a fiasco!

Now onto my darling Mrs Simkins who swanned around in a gondola, whilst she nibbled away on the very best of Venetian fayre – and for those that need clarification, she dined on a small boat whilst coasting the still waters of Venice. Well, one can only presume that she did! as my beloved is rather fond of Italian food and those elegant vessels that glide on water! 

Darlings, due to the moreish nature and first-class reputation of Italian food and drink, Mrs Simkins and I are delighted to share with you our culinary memories and delectable recipes – Ta very muchly!

So, without further ado, please join us at the table for a good ol’ chumble on our delicious pageantry of Italian food – How spiffing! 

VIVA ITALIA!

https://www.youtube.com/c/misswindsoruk


Mrs Simkins Italian Rambling Lamb (via Ken Barlow of Coronation Street)
patate di agnello in fuga, patate di agnello fuggito, patate di agnello vagante

Welcome back to Mrs Simkins and Miss Windsor’s Italian Escapades.

I had planned to bring you spaghetti carbonara for my second recipe, based on the gorgeous one we had in that lovely restaurant in Venice earlier this year (see intro). We were only there for 3 days and I never got the chance to order my own but the forkfuls I blatantly stole from my husband’s plate were absolutely wonderful.

Anyway, as I was saying to Miss Windsor the other day, I shall have to put that on hold as our hens, now sadly depleted from 5 to 4, have gone off lay for a while and we are lucky if we get one or two eggs a day. A series of family birthdays and other events has meant eggs have been whipped away from under the hens for cakes almost as soon as they are laid.

When a dish is so dependent on the quality of the eggs, I wanted to hang on until our remaining girls perk up: we are also planning to buy a couple more hens any day now so we should be back in business soon. There’s nothing like new laid eggs from your own hens, once you’ve kept hens, it spoils you for shop bought ones.

I suggested to Miss Windsor I do one of my favourite Italian potato recipes instead. Ironically, I first heard of this dish not in Italy at all but from the comfort of my sofa one night last year whilst watching Coronation Street. Fellow fans will be familiar with long running and popular character, and self-styled man of culture, Ken Barlow.

Miss Windsor isn’t quite as dedicated to the Street as I am but has been known to watch the occasional episode and thought the recipe sounded good.

On this occasion, Ken was hosting one of his dinner parties for fellow characters Audrey, Cathy and Brian. Brian remarked how good the potatoes were and everyone agreed. Apparently, Ken had got the recipe years before inside a Christmas card from a friend in Italy. 

Unfortunately, a more recent recipe of his, goat’s cheese lasagne, met with a less enthusiastic reception from his guests: mature woman of the world, hairdresser (and long-standing rival of Audrey’s in more ways than one) Claudia, remarked it had an unusual taste and prospective daughter in law Sinead, newly pregnant was unable to eat a bite. Son Daniel picked his way through stoically.

I’m so pleased I was watching the Street that night: I researched the recipe the next day and now it’s a big favourite: it’s also very easy to make.

This traditional Italian way with potatoes came about because it gave the impression you were eating lamb even though you couldn’t afford the actual meat. It’s also known as runaway or escaped lamb.

The flavours of wine, garlic and rosemary are absorbed into the potatoes and give the distinct impression that there might be lamb involved. Fabulous served with crusty bread on its own, it also makes a great accompaniment to roast meat or fish.

800-900g potatoes, peeled and cubed 

1-2cloves garlic, halved or quartered

3 tablespoons oil 

1-2 large, dense sprigs rosemary

2-3 small sprigs thyme

Sea salt flakes

Coarsely ground black pepper 

100ml dry vermouth (or use 200ml of the more traditional white wine and leave out the water)

100 ml water 

Plus: extra rosemary, including flowers if available, to garnish 

Preheat oven to 180°C (fan oven) or equivalent 

You will need an oven-proof dish

Toss potatoes and garlic in oil in the baking dish. Tuck in herbs and season with salt and pepper. Turn gently to coat and pour over wine or vermouth and water.

Bake for up to an hour, turning a couple of times, until potatoes are golden, soft and sticky and have absorbed all the liquid.

Discard spent herbs and garnish with fresh rosemary. Serve immediately. 

Cooking with Dry Vermouth

Wine adds a beautiful flavour to dishes, there is no denying, but I must admit, I find it hard to slosh a whole glassful into a recipe from a newly opened bottle, always thinking: I wouldn’t have minded drinking that! I do tend to save the ends of bottles and freeze them inside a sealed freezer bag for cooking with, but usually when white wine is called for in savoury recipes, I use dry vermouth. 

I like it because as it’s fortified and an opened bottle lasts for ages in a cool place. It’s stronger than table wine so you need less and I love the beautiful herbs and aromatics it’s infused with.

Originally thought of as medicinal and drunk as a tonic, it became popular as an aperitif and then as an essential part of several well-known cocktails: gin and vodka martinis for example.

The name vermouth comes from wermut, German for wormwood which was once one of vermouth’s main flavourings.

How to Pronounce Vermouth

So how do you actually say vermouth? Is it ver-mooth or ver-muth

It’s the first: ver-mooth.


Two Tiramisus for You

Miss Windsor and I love tiramisu and have both noticed how actual Italian tiramisu in Italy isn’t terribly alcoholic, if at all. We decided we’d bring you our own special versions, mine based on my Venice one and Miss Windsor’s made with one of her favourite tipples, Harvey’s Bristol Cream, which I think is an inspired British alternative to the customary Italian marsala or vin santo. We love them both equally and we hope you will too.

Mrs Simkins Tiramisu Trifle

Tiramisu is one of the nicest puddings in the world but usually, to be honest, a bit of a faff to make at home. As I mentioned above, I had the most lovely one earlier this year during our late May jaunt to Venice, which on close inspection, turned out to be more of a tiramisu trifle. 

In place of the expected marsala-enriched zabaglione blended with mascarpone and layered with coffee-soaked sponge fingers, was a beautiful confectioner’s custard sitting on coffee-soaked sponge, topped off with whipped cream and cocoa powder. It was absolutely gorgeous.

I’d promised our tiramisu-loving friend I’d take a photo of a genuine Venetian tiramisu for her (she and her late husband visited Venice many times years ago and she always had tiramisu for pudding. They would sample different restaurants every night so she’s practically a world authority on Venetian tiramisu!)

Anyway, when my tiramisu arrived, it looked so inviting I dived straight in and only remembered the photo when I’d virtually licked the bowl clean. 

Our friend came round for Sunday dinner recently and I made my own version of the Venice one for her. I couldn’t detect any alcohol in the original but since we all enjoy a tipsymisu I’ve added a generous measure of Kahlua coffee liqueur to the sponge.

A light dusting of drinking chocolate gives a more mellow finish than the traditional substantial amount of cocoa, but use cocoa, or grated dark chocolate, if you prefer.

We all loved it and she said it was the best she’d ever tasted: certainly, she tucked into seconds very enthusiastically and we’ve promised to have it again next time she comes round. 

Tiramisu literally translates from the Italian as ‘pick-me-up’ or ‘cheer me up; and this one certainly left us all feeling very perky and cheered up indeed!

Serves 6

Sponge layer

  • Approximately half 200g pack Italian sponge fingers or savoiardi (aka ladyfingers)
  • 150ml strong brewed coffee 
  • 3 measures (45ml) Kahlua 

Custard

  • 2 egg yolks
  • 1 egg
  • ½ teaspoon vanilla extract
  • 50g golden caster sugar
  • 175ml milk
  • 175ml double cream
  • 3 level tablespoons cornflour

Plus

  • 300ml double cream
  • Drinking chocolate or cocoa powder to finish

A 20cm rectangular dish will accommodate 100g sponge fingers perfectly

Lay the sponge fingers in the dish and pour over coffee and liqueur. Chill.

Whisk egg and yolks and pass through a sieve. Whisk sieved egg into a roomy bowl with vanilla and sugar until foaming.

Mix cornflour to a smooth paste with 3-4 tablespoons of cold milk taken from the measured amount.

Warm milk and cream in a small heavy bottomed pan until almost boiling.

Pour into the cornflour paste, whisking gently throughout. 

Now whisk milk, cream and cornflour mixture gently into the combined eggs, sugar and vanilla.

Wash out pan and return mixture to the heat. Cook gently, stirring gently constantly with a wooden spoon changing to a whisk as the mixture starts to thicken.

Once thickening, turn off heat and whisk until smooth and creamy. Cool slightly and pour over sponge fingers. Chill for several hours until set.

Whisk cream into soft peaks and spread over custard. Chill again and dust with drinking chocolate before serving.

For complete perfection, serve with strawberries and a small coffee on the side.

Next time: spaghetti carbonara


Miss Windsor’s Italian Inspired Cherry Tomato Pasta!

Hello, darlings!

Miss Windsor’s Italian Inspired Cherry Tomato Pasta is just the tonic for the hungry-hearted – Mamma mia! You see, my vegetarian recipe is splendidly quick and easy to re-create – using the very best of Hammersmith’s harvest. Namely, ‘whimsical’ Winnie’s (By Jove that’s quite a mouthful!) titillating good allotment grown tomatoes – I say, Winnie’s such a dear heart for donating her little red balls of goodness to my ‘Eatalian’ culinary cause! Darlings, my mouth-watering delectable delight also boasts a plethora of ingredients: olive oil, garlic, onion, mushrooms, Moroccan dry black olives, cavolo nero cabbage, and basil – quite simple, yet devilishly tasty! 

And may be wolfed down hot or cold along with your favourite pasta – I favour Garofalo Casarecce Pasta – a teeny weeny reminder of my trip to Naples. Or to be scoffed following a jolly good session at the gym – which will certainly boost one’s energy levels and quench one’s hunger pangs- How spiffing!

Oh, and before I forget – I hereby present this delightful dish as my first offering to Mrs Simkins and Miss Windsor’s Italian themed collaboration. You see, we’ve just celebrated the last ‘hurrah’ of our first culinary venture – as we whipped up an assemblage of savoury and sweet teatime treats – I say, I do hope you’re well acquainted with our recipes? If not, then please do take a peek and I’ll see you back here in a jiffy! 

Moving swiftly on – now, I must pay homage to my dear Italian friend – the exceedingly vivacious Viviana Ciccone, who offered Miss Windsor a helping hand in the realm of traditional Italian cookery – How fabulous! In fact, Viviana attributes her magical culinary skills to her darling mother Michelina. And luckily for Miss Windsor, Viviana taught her how to make an authentic Italian pasta sauce from scratch – which has certainly been put to good use!

Darlings, before you trot off to your kitchen, please take note of my most useful TIP: I recommend you refrain from serving Miss Windsor’s frightfully delicious dish all at once. So, why not fill up a Tupperware vessel then pop it into the fridge for later – there’s a good darling! I dare say, this snippet of Italy tastes even better when cold. 

So, whatever your preference – a midday nibble or a midnight snack - I personally guarantee my dish will satisfy all palates and leave you yearning for more – Oh, I say! Please enjoy with a splash of olive oil; a sprinkling of parmesan cheese; a smattering of cracked black pepper; and a rather decorative basil leaf – Voila!

VIVA ITALIA!

Miss Windsor X

Preparation time: 30 mins

Cooking time: 25 mins 

Serves 4 to 6 delightful guests

Ingredients

  • 225ml (8 US fl oz.) of extra virgin olive oil
  • 3 or 4 large cloves of garlic
  • 1 large diced onion
  • Large handful of Moroccan dry black olives (add a few more if you desire)
  • 500g (2 & 1/2 cups) cherry or any large tomatoes – chopped 
  • 120g (1 & 1/2 cups) sliced mushrooms
  • 6 or 7 leaves of shredded cavolo nero cabbage (or savoy cabbage will do)
  • 6 basil leaves
  • 500g (approx. 4 1/2 to 5 cups) of any pasta such as penne
  • salt and pepper
  • for decoration: basil leaves

Equipage 

• a large/deep frying pan

Method

  1. Darlings, squeaky clean hands please – Ta very muchly!
  2. Okey dokey! Pour the olive oil into a large saucepan and set the hob to medium / high heat.
  3. Finely chop the garlic and roughly dice the onion, then add to the oil. Darlings, now turn down the heat to just below medium – so the oil gently simmers.
  4. Chop the cherry tomatoes in half (or chop large tomatoes into quarters) slice the mushrooms and prepare the Moroccan black olives by cutting in half and removing the pips. Transfer to the frying pan.
  5. Now, gently place 6 basil leaves on top of the ingredients – Much obliged!
  6. Darlings, for the next 20 to 25 minutes the ingredients will gently simmer and should start to thicken up a little.
  7. About half-way through cooking time, put a large saucepan of water onto boil – add a glug of olive oil and a dash of salt.
  8. Once the water begins to ‘gallop’: with a steady hand add the pasta and turn down the heat a tad.
  9. Darlings, by now the rich aroma of authentic Italian cuisine will gleefully arouse your senses – Oh, I say! So, one mustn’t become too excited, or you may overcook the pasta!
  10. However, before you test the pasta take a small mug and fill with hot water from the pasta pan. Then pour this over the simmering ingredients – this will loosen the mixture and stop it from drying out.
  11. Add the shredded cavolo nero cabbage to your authentic Italian sauce and allow to steam a little. Then gently combine and simmer gently for a few minutes more.
  12. After 8 minutes or so, you may test the pasta! Darlings, the Italians, oh and Miss Windsor, prefer their pasta cooked ‘al dente’ which translates ‘to the tooth’. And to translate again, means ‘you need your teeth to chew the pasta’ – comprende? So, poke a fork into the water and emerge with a piece of pasta! If your gnashers sink in, yet not too easily - then it’s ready. If not, cook for a couple minutes more.
  13. Once perfectly al dente, remove from the heat and drain using a colander. Then immediately wash the pasta in hot water to remove the starch. Drain again.
  14. Pour the pasta back into the saucepan, add your authentic Italian sauce, some cracked black pepper, then thoroughly mix together.
  15. Darlings, serve in a pleasant looking vessel and enjoy with a splash of olive oil; a sprinkling of parmesan cheese; a smattering of cracked black pepper; and a decorative basil leaf - Voila!


Welcome to Mrs Simkins and Miss Windsor’s Summer Garden Party!

Thank you so much for calling in and welcome to this special web page. My friend Miss Windsor and I have chummed up and over the next few weeks will be bringing you our favourite tea-time recipes: perfect for a summer garden party and just in time for the 65th Anniversary of the Queen’s Coronation on June 2nd and National Cream Tea Day on June29th.

For two old-fashioned girls it’s strange that Miss Windsor and I met on twitter of all places! Synchronicity was at work and we followed each other at exactly the same moment after bonding over our shared love of Brown Betty teapots (we have quite a collection between us). We soon found we had very much more in common: cups of proper tea made in a pot (a brisk brew for Miss Windsor, Earl Grey for me) lovely food, traditional recipes and vintage tableware to name just a few things - oh, and talking! We can both talk for hours! Very soon we had become firm friends off-line as well as on. We also discovered we are both inspired by two of our grandmother’s and their cooking: Miss Windsor’s Grandmother Josie and my own Nana.

So stay tuned and find out what the Tea-Time Twosome have come up with for you over the coming weeks.

Follow Mrs Simkins on Twitter. @MrsSimkinsCooks


Miss Windsor: Bringing Food History Alive and Theatre to Your Table

Let me to introduce you to my friend Miss Windsor. Although now living in some style in London, Miss Windsor was brought up in the West Country and is still a country girl at heart.

Food played an especially memorable role in her childhood both in terms of eating and creating. She was inspired by two passionate cooks in particular: her Grandmother Josie and home-economics teacher, Miss Pepper, who both encouraged her natural talent for baking and food in general. If food memories from childhood give you a warm glow, and you enjoy traditional British recipes and food history with flair, you will love Miss Windsor.

In her own words:

“Well, darlings, in brief, I’m a theatrical food writer, culinary storyteller, and a budding food historian – Oh, and I absolutely adore cooking with rum, collecting vintage crockery/kitchenalia and royal memorabilia! Therefore, I employ my rather elaborate style of writing to compose articles, restaurant/afternoon tea and product reviews for the media – all pertinent to my theme of ‘food history’. I also revive rousing recipes from around the globe, with a bit of a Miss Windsor twist, of course!”

Visit her website and blogs to find out more: don’t miss her fantastic articles on Mrs Beeton and Mrs B’s American counterpart Fannie Merritt Farmer – absolutely brilliant!

Website: www.misswindsor.uk & Twitter/Facebook/Instagram @misswindsoruk

And there’s even more: you’ll be pleased to hear you can also watch Miss Windsor in action in her YouTube series Miss Windsor’s Delectables

https://www.youtube.com/c/misswindsoruk


Mrs Simkins Victoria Sponge

Miss Windsor and I have come to the end of our summer garden party collaboration and hope very much you’ve enjoyed it as much as we have. We’re taking a bit of a break now but will be back before too long with a special quartet of recipes inspired by our respective Italian travels earlier in the year.

Until then, we leave you with Miss Windsor’s sparking summer beverages: a fabulous fizzy lemonade which she also uses to make a gorgeous summery cocktail with Pimm’s number 6 cup, a special edition one with elderflower and blackberry. It sounds so nice I can’t wait to try it. I really must get out more as I’d never even heard of this Pimm’s until Miss Windsor told me about it!

And, finally, from me a classic Victoria sponge. Every garden party needs a nice simple Victoria sponge so here you are; complete with tips and a brief cake history.

(You may be wondering why our garden party has suddenly morphed into a bit of a Teddy Bear's Picnic as well, but all will become clear as you read on.)

Finding Comfort in Cake

Named in honour of Queen Victoria, Victoria sponge is still a favourite on the royal tea table today. There’s rather a sad story behind it. After Prince Albert died suddenly (he was only 42) Queen Victoria was understandably completely distraught and withdrew to Osborne House on the Isle of Wight where she and Albert had spent several happy holidays.

There she found the new custom of afternoon tea a great comfort: one of her favourite cakes was a plain, light sponge filled with jam. She asked for it so often it became known variously as Victoria sponge, Victoria sandwich, Victoria sponge sandwich or Victoria sponge cake.

From Nursery to Grown-Up Tea Table

This simple sponge had originally been a popular choice for nursery teas: it was plain and wholesome, yet appealingly soft-textured and sweet. Victoria and Albert had been at the forefront of the brand new nursery concept, encouraging parents to allow their children to enjoy childhood with special games, books and toys.

Prior to this infants progressed more or less directly from babyhood to virtual mini-adulthood. The royal couple had made a point of being present at nursery tea whenever they were home and Victoria must have enjoyed a slice of jam sponge frequently as they played with their brood.

In the first throes of her grief she may have sought solace in these happy memories and found the cake consoling as well as easy to digest.

In Victoria’s time, her kitchen maids would have spent hours building up their muscles creaming and mixing the sponge by hand, even after the helpful arrival in Britain of baking powder in 1856. Some cooks still swear by the creaming method but it’s much easier to whip up your sponge by electric means using a food processor, electric mixer or electric hand whisk. 

Baking Tips

As with many cooks, this was the first sponge cake I learned to make, and for years now I’ve whipped mine up in a basic food processor using the blade attachment. After a few false starts with self-raising flour I switched to plain and added my own raising agents.

Self-raising flour must be really, really, fresh to work properly and even then I find it touch and go. A combination of cream of tartar and bicarbonate of soda with a ratio of 2:1 works wonders in the well-risen, light and fluffy stakes.

Real butter, slightly salted and softened, the freshest eggs and raspberry jam, ideally seedless, sieved if not, are other essentials.

After that, the only variable you have to contend with is your oven, which, ideally, would always runs at consistent temperatures corresponding exactly to the dial and have no hot or cold spots at all.

Alas, many of us are at the mercy of our ovens . . . .

  • 175g slightly salted butter, softened
  • 175g golden caster sugar
  • 175g plain flour
  • 1 level teaspoon bicarbonate of soda
  • 2 level teaspoons cream of tartar
  • 3 medium eggs, as fresh as possible
  • 2 tablespoons milk
  • Seedless or sieved raspberry jam and icing sugar to finish

Preheat oven to 160C (fan ovens) or equivalent 

You will need 2 x greased 18cm (7 inch) loose bottomed sandwich tins

Cream or whiz the butter and sugar until light and fluffy.

Combine flour and raising agents and sieve half over butter mixture.

Add eggs and remaining flour. Whisk or whiz again. Add milk and whisk or whiz until smooth and glossy.

Pour into prepared tins.

Bake for 18-20 minutes or until risen and golden and a skewer inserted comes out clean.

Allow to rest for a few moments then carefully loosen the edges with a small palette knife.

Transfer to a cooling rack using a large palette knife to loosen the bottoms.

Once the cakes are cool, spread one with jam and sit the other on top. Dust with icing sugar just before serving.

Follow Mrs Simkins on Twitter. @MrsSimkinsCooks

Damien Marcus says:

I am going to have to try your method of SR flour when making dumplings (the suet ones). Winter will soon be fast upon us!

Mrs Simkins replies:

Thank you for taking the time to comment, Damien. I’m glad you’ve found this tip useful. Yes, I always use the cream of tartar/bicarb combination in my dumplings and they come up fluffy as anything.

At least we have a good chance of an Indian summer this year!


Mrs Beeton’s Quick-Fire Fizz Lemonade!

Hello, darlings!

Please join Miss Windsor for a jolly good go at re-creating this refreshingly zingy beverage of Mrs Beeton’s Quick-Fire Fizz Lemonade - ‘easy peasy lemon squeezy!’

Oh, and it’s just what the doctor ordered to reduce one’s body temperature whilst enduring such an unusual spell of sweltering hot weather – I dare say, it’s definitely a one-off for Great Britain that’s notoriously known for its mediocre summers – My word, wonders never cease! 

Darlings, I discovered this recipe in my 1906 edition of Mrs Beeton’s Book of Household Management. You see, I was instantly captivated by Mrs Beeton’s wizardry skills, as she had concocted such a magical potion with only a few simple ingredients: water, lemon juice, sugar – plus a smattering of ‘bicarbonate of soda’ – How inventive, Mrs Beeton! 

Please note: To suit the singleton I've adapted the measurements ever so slightly, however, one may increase the measurements if expecting guests. Oh, and have you noticed that I've changed the title of this recipe from plain Lemonade to Mrs Beeton's Quick-Fire Fizz Lemonade? – no doubt she'll approve.

Darlings, now quiet please while my darling Mrs Simkins; culinary collaborator utters a riveting question: “Miss Windsor, this recipe sounds a tad like a scientific experiment, please do explain!”

Well, darling, what can one say! the Victorians were rather fond of experimental cookery, and so was our culinary wizard - Mrs Beeton! Thus, I discovered that some of her recipes are quick to whip up with a desire to be served in an instant – Voila!

Of course, there'll be no danger of fire as one preforms Mrs Beeton’s method for lemonade; it’s merely swift and easy to re-create. And so, this rousing recipe from yesteryear fits perfectly in the ‘quick-fire’ category, as it will only take a snippet of your time to make – How spiffing! 

Oh, and the ‘fizz’ element of Mrs Beeton’s culinary experiment is produced by a quarter teaspoon of bicarbonate of soda – Well, what do ya know! So, upon releasing the magic powder into the lemony water, Miss Windsor guarantees instant gratification – Oh, I say! As you eagerly watch your summery refreshment become an effervescent mix of ingredients. I must add, the froth really reminds me of Alka-Seltzer – you know, the chalky tablet to nurse one’s hangover! 

Darlings, Mrs Beeton’s Quick-Fire Fizz Lemonade is extremely versatile – and can be supped from a glass tumbler whilst you relax in an easy-chair watching the world go by; to be served as a sweet tipple at afternoon tea or summer garden party, or to bottled then shared at your annual family picnic – whatever the event this piquant beverage with a sweet edge is ‘just the ticket’! Oh, and one mustn’t forget to mention, that this sizzling swift recipe is the perfect ‘mixer’ for cocktails – hence, I used Mrs Beeton’s magical beverage in Miss Windsor’s Blackberry & Elderflower Post-Tennis Pimm’s Cocktail. 

So, my dear ones, without further ado, please hotfoot into your kitchen, and before one can say ‘Bobs your uncle, and Fanny’s your aunt’! you’ll be supping on Mrs Beeton’s age-old recipe for lemonade – Oh, isn’t she so generous!

Enjoy! 

Preparation time: 5 mins

Serves 1 fabulous ‘you’ (double the ingredients for 2, and so on!)

Ingredients 

  • 150ml (5 US Fl oz.) of cold water
  • juice of 1 lemon 
  • caster sugar to taste – approx. 2 to 3 flat teaspoons (add more if too sharp)
  • 1/4 flat teaspoon of bicarbonate of soda
  • for decoration: 1 slice of lemon & 1 slice chopped into segments 
  • optional: ice to serve

Equipage

  • lemon squeezer
  • glass tumbler

Method

  1. Darlings, now squeaky-clean hands please – Ta very muchly!
  2. Squeeze the juice of 1 lemon. 
  3. Measure the cold water, then pour in the lemon juice and stir (TIP: make sure youstrain the juice to remove bits of flesh. Do not pour directly into the water)
  4. Add the caster sugar and mix well. Add more if too tart.
  5. Now the fun bit! Plop 1/4 flat teaspoon of bicarbonate of soda into the lemon water. It will start to fizz and froth immediately, but still, give it a quick stir to evenly distribute the powder.
  6. Darlings, you see I told you so, it’s ‘easy peasy lemon squeezy’!
  7. Now, it’s time to enjoy your creation – fill a glass tumbler with ice, followed by the lemonade, throw in a few lemon segments, then decorate with a twist of lemon – Voila!

Enjoy!


Miss Windsor’s Blackberry & Elderflower Post-Tennis Pimm’s Cocktail!

Hello, darlings!

Anyone for tennis? Oh, dearie me, last shout for The Championships Wimbledon was on Sunday 15th of July. But not to worry, Miss Windsor’s here to console you with a sup or two of her frightfully fruity Pimm’s cocktail - which is just the tonic to soothe one’s post-tennis blues.

Or why not join Mrs Simkins (my culinary collaborator) and I for a quaff at our

summer garden party!

So, move over Mr Original Gin Sling, and make way for Miss Windsor’s intensely vibrant vodka-based tipple – Toot sweet! which oozes a luxurious touch of Chambord Black Raspberry Liqueur. 

Oh, and by the way, my recipe tastes rather like ‘pink sherbet’ – which funnily enough sparks nostalgic childhood memories: as many moons ago, I recall an aura of glee whilst I guzzled down a ’99’ ice cream spattered with sweet pink fizz – How scrumptious!

You see, I wish to share, that for a good few years now lurking around in my pantry – Oh, I say! was a rather dusty, yet sultry and slender looking figure – “Oh, please do expose more Miss Windsor?”

I hear you express with such deep desire. Well, darlings lets refrain from

becoming a little too excited here! and so I must confess the mysterious figure turned out to be – the one and only Special Edition of Blackberry & Elderflower Pimm’s – Oh, how delightful! 

I say, darlings, this is not just any old Pimm’s, in fact, this vodka-laced, fabulously fruity infusion which boasts a bountiful taste of our English summer hedgerows, was bestowed upon Miss Windsor many years ago by her darling friend Sir Brian – Oh, what a generous chap! And with a recipe in mind for my pantry find, I wished to perform a bit of a Miss Windsor twist, thus adding a tad more than just the ‘bog-standard’ lemonade - as my modern mentor: the jolly old internet recommends! So, of course, I called upon my trusty Mrs Beeton who offered me her rather luscious lemonade recipe – Phew! 

Moving swiftly on, I expect most of you are familiar with Pimm’s No.1 Cup – a gin-based herbaceous cocktail, which during the 1800’s, Mr James Pimm’s of London originally invented to promote one’s health – I say, I do often wonder if he succeeded in that department?

Anyway, you’ll be pleased to know, in total there are six varieties of Pimm’s –

How fascinating! Darlings, interestingly, the refreshment in question was introduced to the UK in 1964 and goes by the grand title of Pimm’s No.6 Cup – Well, what do ya know! In fact, this particular digit served as the perfect foundation for the divine creation of Blackberry & Elderflower Pimm’s – which first graced the market of fine liquor in 2012 – How spiffing! 

Now, darlings, tick tock, tick tock – it’s nearly Pimm’s o’clock! So, without further ado, please dash off to your elegant drinks cabinet and have a jolly good go at re-creating Miss Windsor’s cocktail!

Enjoy! 

Preparation time: Preparation time: 10 mins

Serves 1 delightful ‘you’! (or double the ingredients for 2, and so on!) 

Ingredients

  • 100ml (3 1/2 US fl oz.) - Blackberry & Elderflower Pimm’s
  • 150ml (5 US fl oz.) – Mrs Beeton’s Quick Fire Fizz Lemonade or any fresh lemonade will suffice!
  • 25ml (2 US tablespoons) – Chambord Black Raspberry Liqueur (also available in the US)
  • plenty of ice
  • for decoration: some blackberries & raspberries or a slice of lemon

Equipage
  • 1 x highball glass (capacity: 350ml / 12 US Fl oz. or thereabouts)
  • 1 x cocktail shaker
  • for decoration: cocktail umbrella – Oh, how fancy! 

Method

  1. Darlings, ‘splish splash’ – please dash off to your hand basin and lather up those mitts of yours – Much obliged!
  2. First off, it’s time to prepare Mrs Beeton’s Quick Fire Fizz Lemonade – it’s ‘easy peasy lemon squeezy’ and takes no time at all! Or on this occasion, one may use readymade lemonade.
  3. Now, simply fill your cocktail shaker to the top with ice – Ta very much!
  4. With a steady hand, measure out the Blackberry & Elderflower Pimm’s and Chambord Black Raspberry Liqueur.
  5. Gently pour both alcoholic tipples over the ice, then add the lemonade.
  6. Darlings, in readiness for your frightfully fruity Pimm’s Cocktail - fill your highball glass near to the top with ice –– How exciting!
  7. Now, give your cocktail a good ol’ shake! So, pop the lid onto your cocktail shaker, and make sure one hand is firmly pushing down on the lid, then shake ‘like the clappers’ – for about 30 seconds or so.
  8. Pour immediately, but slowly into your highball glass – there’s a good, darling!
  9. Then before serving: to the spikey end of a cocktail umbrella, add a few berries of your choice. Oh, and why not plop a few into your cocktail mixture while you’re at it!
  10. Alternatively, decorate with a zingy slice of lemon – Voila!

Darlings – I’m sure this intensely vibrant, sweet n’ sharp fruity tonic, will lift your spirits, whilst soothing away your post-tennis blues!

Enjoy!


Quiche & Tell: Mrs Simkins Mini Quiche Secrets

Mini quiches are always a great savoury favourite for parties and picnics and a must for garden parties. Add some cooked diced bacon or lardons if you prefer but the simple cheese and onion flavour is delicious and also suitable for non-meat eaters.

Easy to make and assemble: particularly if you whiz up your pastry in the food processor and make an all in one filling rather than faffing about adding cheese and onions and what have you separately, plus, unlike full size quiches, you don’t have to bake the pastry cases blind first either.

Quiche Query 1

Just to clear up a couple quick quiche queries before we start: as Miss Windsor and I were discussing on the phone the other day, the lovely savoury cheesy tarts we all make and love and nonchalantly refer to as ‘quiche’ aren’t technically quiche at all.

Classic Quiche Lorraine, from the Lorraine region of France, was originally a pastry case filled with a delicate, beautifully wobbly filling of lightly seasoned cream, eggs and bacon. The more familiar version with cheese; should really be called a savoury flan or tart, but times change and the name quiche seems to have stuck, and why not?

In fact, if we delve deeper into history, it seems quiche wasn’t originally French at all but German. Stretching back to the Middle Ages, when Lorraine was part of Germany and known as Lothringen, it was a savoury kuchen or cake, and, instead of pastry, the crust was very likely bread, rather like a pizza base. You live and learn, as Miss Windsor and I always say.

Quiche Query 2 Plain or Fluted Cutters?

Should you use a plain or a fluted cutter for your mini quiches? Strictly speaking, plain cutters are intended for savoury tarts, fluted for sweet. If this sounds a bit regimented, it is actually a handy convention as it helps distinguish savoury from sweet fillings instantly. On the other hand, if you feel inclined, why not break with convention occasionally? Fluted edges do look so pretty and appealing after all!

Make Pastry in a Food Processor

You can make beautiful buttery melt in the mouth pastry quickly and easily in a food processor. It’s simplicity itself: but do follow the measurements and method exactly.

Top Tip 1

Stop processing the very second the pastry begins to clump together: otherwise it will be tough and lose that lovely melt in the mouth, slightly flaky quality.

Top Tip 2

As you cut out, leave as little spaces as possible between rounds to minimise handling and re-rolling. Too much handling also makes pastry tough.

Top Tip 3

Grate your cheese finely: use the fine side of a box grater. You’ll find it then melts silkily into the savoury custard giving a much smoother result.

Top Tip 4

Stir mustard powder through a tea strainer with a teaspoon to prevent it clumping together.

Top Tip 5

When transporting the little quiches, cool them first, line your container with greaseproof paper and for a double layer: lay a piece of slightly crumpled greaseproof paper over the first layer.

Makes 24

Pastry 

  • 160g plain flour
  • 80g cold salted butter, diced
  • Extra pinch of salt 
  • 3 tablespoons cold water

Filling 

  • 1 small onion, finely diced
  • Scant tablespoon oil
  • 1 medium egg
  • 1 medium egg yolk
  • 6 tablespoons cream (single or double, but not extra thick)
  • 60g or so of mature Cheddar cheese, finely grated, see top tip 3
  • ¼ - ½ teaspoon dry mustard powder
  • Ground white and cayenne pepper

You will need 2 x12 cup greased tart tins and a 6cm cutter

Preheat oven to 180C (fan oven) or equivalent

Combine flour, butter and salt. Whiz into fine crumbs. Add water and whiz again. Once large clumps begin to form stop immediately and remove from processor. Press gently together into a ball.

Roll out gently on a lightly floured board to a thickness similar to a pound coin.

Cut out rounds and pat gently into tart tins.

Push remaining pastry lightly together, and cut out the rest.

Fry onion slowly until soft just beginning to colour. Drain on kitchen paper.

Whisk egg and egg yolk together with the mustard powder and peppers. Add cream and whisk in lightly.

Stir in onions and cheese. Divide filling evenly between pastry cases: each one will take roughly a generous teaspoon.

Bake for 15 minutes or until risen and until golden. Serve warm or cold.

Follow Mrs Simkins on Twitter. @MrsSimkinsCooks


Miss Windsor’s Seriously Scrumptious Lemon & Coconut Cake!

Hello, darlings!

I hereby present my delightful sweet offering to Mrs Simkins and Miss Windsor’s summer garden party – my Seriously Scrumptious Lemon & Coconut Cake. What an adorable addition to your very own garden party, or afternoon tea pageantry of exquisite cakes and bakes. Oh, yes, and please enjoy a slice or two with a cup of your favourite brew!

Darlings, just as it says ‘on the tin’ – it’s seriously scrumptious, very lemony, with a saucy taste of paradise - Oh, I say! I fear I’m sounding off like an advert for a Bounty chocolate bar! But nevertheless, I’m quite sure my glorious cake will send you into a hedonistic state of ‘coconutty’ heaven – How spiffing! 

Now, moving on swiftly to my ever so intriguing theme of ‘food history’! You see, my darling mentor from yesteryear – Mrs Beeton – kindly offered me her rousing recipe for Cocoanut Cake from my 1906 edition of Mrs Beeton’s Book of Household Management. Therefore, with her blessing, I opted to re-create such recipe - with a bit of a Miss Windsor twist, of course! 

Darlings, now I must confess, whilst the cake was in the oven I did call upon my mother’s culinary expertise – no offence Mrs Beeton! You see, I was in need of a ‘tit-bit’ or two, and my mother just so happens to have considerable experience in the realm of baking – Oh, lucky me!

I say, Mother suggested, “As an alternative to bringing the cake mixture to a batter with milk, one could do so with coconut milk instead!” Thank you, Mother, one shall try that next time. 

Darlings, Miss Windsor must express that she is wholly enamoured with her creative ‘spin’ on Mrs Beeton’s recipe. I say, how baffling it would be if one denied their fondness for such an invitingly fresh, extremely moist, coconutty, scrumptiously summery, piquant, yet pleasantly sweet creation! 

Now, before I pop off, may I reiterate that this is an “Exceedingly good cake,” as our British national treasure, male species of the baking world has been known to enthuse about his own baked goodies – the one and only Mr Kipling!

So, darlings, without further ado, please ‘pitter-patter’ into your kitchen and have a grand ol’ time!

Preparation time: 40 mins

Cooking time: 40 mins 

Serves: 10-12 delightful guests!

Ingredients

  • 170g (just under 1 cup) unsalted butter – room temperature
  • 225g (1 & 1/4 cups) caster sugar
  • 450g (3 & 3/4 cups) plain flour / all-purpose flour
  • 100g (1 & 1/2 cups) desiccated coconut
  • 6 heaped teaspoons of baking powder
  • 3 x eggs
  • 500ml (2 & 1/2 cups) whole milk or coconut milk
  • 3 teaspoons of lemon essence 
  • zest of 1 lemon
  • a sprinkling of desiccated coconut – to add before baking
  • optional: juice of one lemon - for extra zing and moisture!
  • a handful of desiccated coconut – for decoration
  • slices of lemon – for decoration

Ingredients for Lemon Cream Filling
  • 24og (1 cup) unsalted butter - room temperature
  • 24og (2 cups) icing sugar
  • zest – 2 lemons
  • 6 teaspoons – fresh lemon juice
  • a generous handful of desiccated coconut

Equipage

  • 2 x sandwich tins (21.5 cm / 8 1/2 inches)

Method

  1. Wash those little ‘mitts’ of yours – Ta very muchly!
  2. Preheat your oven to a moderately warm temperature of 180 *C / 160*C Fan / 350*F / gas mark. If you have a rather quick oven, then please turn the temperature down a tad – much obliged!
  3. First off, grease sandwich tins with butter, and line the bottom with greaseproof paper - be careful not to over grease, as one must avoid frying the sides of this divine creation! Then dust the sides with flour.
  4. Using one of your mixing bowls sieve together the baking powder and flour – do so four times to make the flour as light as possible. Then add the desiccated coconut and mix well.
  5. In a separate mixing bowl cream together with a wooden spoon: the butter (room temperature) and sugar. Then as per Mrs Beeton’s instruction, “Beat up well with a large wooden spoon”.
  6. Merrily beat in the eggs one at a time, followed by 3 teaspoons of lemon essence and lemon zest.
  7. Add creamed mixture to the flour, and as Mrs Beeton suggests, “Bring to cake batter consistency with milk”. Miss Windsor achieved this by using a vintage ‘batter whip’, but feel free to use a wire whisk!
  8. Divide carefully into your prepared baking tins, and smooth over with a palette knife.
  9. Sprinkle some desiccated coconut over the top, then place both tins on the middle shelf and bake for approximately 40 minutes – start checking at 35 minutes.
  10. Cover both cakes with foil half-way through, as this will help to prevent them from browning too quickly.
  11. Your cakes are ready when they have shrunk from the sides a little, nicely browned, and a skewer comes out clean.
  12. Once perfectly baked, allow to cool on a wire rack.
  13. Whilst cooling, it’s time to crack on with the Lemon Cream Filling!
  14. Cream together the butter and icing sugar - then add lemon juice, zest, and a generous handful of desiccated coconut. Mix well.
  15. Once your cakes have completely cooled, carefully spread the filling over one cake then ‘sandwich’ together.
  16. If you prefer your cake to have a bit more zing, and for the texture to be very moist. Then prick your cake with a skewer, and carefully drizzle over the juice of one lemon. If you choose to do this, then allow the juice to absorb overnight or for a good few hours before serving.
  17. When ready to serve, place on a pretty plate or exquisite cake stand of your choice.
  18. Sprinkle with more desiccated coconut.
  19. Serve each slice with a slice of lemon!

Enjoy with oodles of gusto!


Scones for National Cream Tea Day

Miss Windsor and I love a cream tea and are in complete accord when it comes to three pressing matters of scone etiquette.

First of all, do you say scone to rhyme with ‘gone’ or ‘phone’?

‘Gone’. And don’t let anyone tell you otherwise!

Secondly, do you pull your scone apart gently at its ‘waist’ or cut it? Miss Windsor and I prefer to pull ours apart and happily; this is the correct scone etiquette!

Thirdly, should you spread your jam on first followed by a spoonful of cream or the other way round?

Miss Windsor and I prefer our jam on first but more importantly, so does the Queen. It appears scones in the royal household are always topped with jam first and then cream.

Until recently, I didn’t even know there was a Cream Tea Society until Miss Windsor mentioned it, but I’m very happy there is and that they are responsible for the annual National Cream Tea Day: on June 29th this year.

I’ve been bending Miss Windsor’s ear slightly this week about the perils of scone making in a heatwave: hot sultry conditions can cause the scone mix to become overly sloppy and scones generally turn out flatter than usual. I’ve adapted my usual recipe and come up with a practically (almost) heat-wave-proof version for summer cream teas.

Mrs Simkins Heat Wave Scones

Makes 6-7 but easy to increase proportionally

  • 225g self-raising flour (newly bought and completely fresh)
  • 1½ teaspoons baking powder (again, this must be fresh although not necessarily newly bought)
  • 40g salted butter, softened
  • 25g golden caster sugar
  • 1 large fresh egg, beaten, and made up to 150ml with full-cream milk (if this is slightly sour so much the better)

You will need (or equipage as Miss Windsor so elegantly says)

A greased or lined baking tray and a 6cm fluted cutter, a food processor is useful

Preheat oven to 220C (fan ovens) or equivalent 

Either, in a roomy bowl, rub butter into combined flour and baking powder and stir in sugar, or whiz flour and butter together in food processor to fine crumb stage and whiz sugar in briefly at end.

Transfer to a roomy bowl if using a processor.

Make a central well and gradually incorporate the egg and milk with a broad bladed dinner knife until you have a smooth but slightly sticky dough.

Keep back a tablespoon of liquid for finishing.

With lightly floured hands, transfer the dough to a lightly floured board. 

Shape into a ball and pat down gently with hands to around 1½ cm thick.

Cut out with a single brisk down and straight up again movement. DO NOT TWIST as the scones won’t rise as high.

Push remaining dough lightly together and cut out again.

Transfer each scone directly to the prepared tray. Keep them fairly close together on the tray.

Bake for 9-10 minutes in total until risen and golden. Bake for 5 minutes at 220C then reduce to 200C for remaining 4-5 minutes. Cool on a wire rack, covered with a clean tea towel to keep them from drying out.

For best results eat same day. These are also good with butter straight from the oven. 

Shippam’s Paste Jars

Incidentally, I always think no proper nostalgic, old-fashioned cream tea in the garden is complete without a Shippham’s fish paste jar of random garden flowers. Happily, I have a vintage one: dug out of the garden of our last home: how lucky is that? I found two of the small ones too!

#NationalCreamTeaDay

Follow Mrs Simkins on Twitter. @MrsSimkinsCooks


Miss Windsor’s Mini-Scotch Eggs

Hello, darlings! 

Well, I say, thank you for popping by – it’s always a pleasure!

So, whilst you’re here I wish to titillate your taste buds with my splendidly gratifying littlemeaty balls of deliciousness – By Jove, that’s quite a mouthful Miss Windsor!

Darlings, I guarantee my recipe created with quails’ eggs and butchers best sausage meat - ‘jazzed up’ with spring onion, a smattering of parsley, plus a dash of wholegrain and Dijon mustard - will satisfy all carnivore palates and will certainly give Fortnum & Mason a ‘run for their money! In fact, they proclaimed the Scotch Egg was invented in 1738 at their Piccadilly, London store – Miss Windsor’s favourite! 

I dare say, according to Fortnum & Mason: this bundle of runny yolk, spiced outdoor-reared pork, and finger-friendly breadcrumb covering “Sits proudly as the original portable pick-me-up”. A trifle confused? Well, in short, it was originally invented for their affluent patrons who would travel by horse and coach all the way to their country abodes. So, when in need of a quick ‘pick me up’, one would delve into their pocket and emerge with a Scotch Egg wrapped in a silk handkerchief – Oh, how inventive! 

Now, moving swiftly on to my spiffing collaboration with darling Mrs Simkins. You see, although I’m known to have a rather sweet tooth; instead of baking yet another sugar-laden goodie for our summer garden party, I thought best to offer a dish of the savoury kind – I say the perfect accompaniment to Mrs Simkins Dainty Tea-Time Sandwiches! 

Therefore, following my theme of ‘food history’ I called upon my culinary mentor from yesterday – the bountiful Mrs Beeton, who advised Miss Windsor to re-create her Scotch Egg recipe – How generous of her! 

Of course, Scotch Eggs are usually consumed in the larger form, however, one wished to reduce the size - just a smidgen - in order to sit comfortably amongst the other teatime treats! So, with this in mind, I opted for quails’ eggs – good call Miss Windsor! 

Darlings, I must admit, I twice attempted my recipe – “Oh, dearie me!” I hear you utter. But do not despair my dears; as you know Miss Windsor always prevails! You see, when fried in oil the meat and breadcrumb coating just cracked and then slid off the egg – not a desirable look! So, with a little help from my darling Mrs Simkins, she advised to bake my little beauties instead – and they turned out ‘egg- ceptional’! 

Okey dokey, before you press on with my devilishly delicious recipe, I advise these are best served at a summer garden party, afternoon tea, buffet, or handy enough to pop into a Tupperware vessel and then pecked at whilst picnicking at your favourite country spot – fabulous! I say these little darlings must be enjoyed with a generous dollop of Piccalilli. Of course, I favour Piccadilly Piccalilli from Fortnum & Mason – only the best will do for Miss Windsor! 

Preparation time: 40 mins / Cooking time: 20 mins 

Serves: 7 to 8 delightful guests (2 per guest)

Ingredients

  • 14 to 16 quails’ eggs 

Ingredients for Meat Layer 

  • 500g (just over 2 cups) of sausage meat - preferably from your local butcher!
  • 3 x finely chopped spring onions
  • 1 heaped tablespoon of parsley
  • 1 heaped tablespoon of wholegrain mustard
  • 1 heaped teaspoon of Dijon mustard
  • dash of cracked black pepper & sea salt

Ingredients for Breadcrumb Coating

  • 2 slices of stale brown bread
  • 4 large crackers or crispbreads
  • 1 egg
  • handful of plain or all-purpose flour

Equipage

  • large baking tray
  • mini-chopper or similar implement!

Method

  1. Darlings, squeaky clean hands – Ta very muchly!
  2. Pre-heat oven to 200 *C / 180 Fan / 400 *F / gas mark 6
  3. First off, fill a large saucepan with approximately 2.5 cm (1 inch) of water – which is just enough to cover the eggs. Then bring to the boil.
  4. When the water begins to ‘gallop’ – neighhh! gently drop in the eggs and boil for exactly 2 minutes.
  5. Allow the eggs to completely cool – whilst doing so, it’s time to crack on with the breadcrumb coating!
  6. Darlings, for this exercise one may succumb to the aid of modern technology! Please reach for your mini-chopper or similar implement, and whizz together the crackers and brown bread – transfer to a medium size bowl.
  7. Now, moving swiftly on to the delicious meaty layer! So, using your mini-chopper again, finely dice the spring onion then pop into a large mixing-bowl.
  8. To the spring onion add the butcher’s best sausage meat, salt & pepper, parsley, and two types of mustard. Blend together well.
  9. Now, divide the sausage meat into 14 to 16 equal pieces – see how far you can stretch the mixture. Then flatten each piece into a patty-like shape ready to en-wreathe the eggs!
  10. Darlings, the time has arrived to gently peel-off the egg shells – steady hands please!
  11. Once successfully executed, one must prepare the ‘assembly line’! – Toot sweet! So, darlings, in a line on your counter: first place the eggs, then the plate of sausage patties, a plate of flour, a small vessel of whisked egg, followed by the bowl of breadcrumbs – Voila!
  12. Now here comes the gooey and rather excitable stage of the process! Ok – roll an egg in flour, then wrap in a sausage patty, roll again in flour, into the whisked egg, followed by a jolly good coating of breadcrumbs. Place on ungreased baking tray.
  13. Repeat process 14 to 16 times!
  14. Place on the middle shelf of oven and bake for 20 minutes. Turn once halfway through cooking.
  15. These little meaty balls of deliciousness will appear slightly sun-kissed when cooked!
  16. Serve hot or cold with a dollop or two of Piccalilli.
  17. Enjoy with oodles of gusto!

Enjoy!


Mrs Simkins Tea Brack

Slices of buttered fruit loaf are always good to have at tea parties, providing a bridge between savoury and sweet and this tea brack is a lovely one. Miss Windsor was quite impressed with it as the method is very similar to her Grandmother’s delicious boiled fruit cake.

Originally known as barm brack and traditional in Ireland and the north of England, tea brack is usually made with baking powder and baked in a loaf tin by modern bakers.

A round cake makes an appealing change and echoes early versions of brack when it was raised with yeast (in the form of barm, or fermented yeasty foam, from the local brewery) and shaped into rounds by hand.

Cut in thin slices across the cake, rather than wedges, and serve spread with butter.

A couple of spoonfuls of whisky give a good flavour but use milk or extra tea if you prefer.

  • 500g mixed dried fruit and peel
  • 150 ml hot tea (a strong traditional brew or lighter Earl Grey, whichever you prefer)
  • 75g dark brown sugar
  • 225g plain flour plus 1½ teaspoons baking powder (or use self-raising flour)
  • 1 large egg
  • 1 teaspoon mixed spice
  • ½ teaspoon ground ginger
  • Generous grating of nutmeg
  • 2 tablespoons of whisky (or milk, or more tea, warm or cold)
  • Melted butter for finishing

Preheat oven to 160C (fan oven) gas mark 3 or equivalent

You will need a buttered round, deep, cake tin or silicone mould or buttered lined ½kg (1lb) loaf tin

Soak dried fruit and sugar in tea overnight: keep it covered.

Combine flour and raising agents and sieve half over mixture. Add egg and stir in, gradually incorporating remaining flour and the spices.

Mix in whisky, milk or extra tea and ease into prepared tin. Smooth top with back of a tablespoon dipped in water.

Bake for 50-60 minutes until a skewer inserted comes out clean. Brush top with melted butter whilst still warm.

Tip: if using a silicone mould, cool cake completely before turning out.

Follow Mrs Simkins on Twitter. @MrsSimkinsCooks


Miss Windsor’s Spiffing Fit for a Queen Chocolate Cream Roll

Hello, darlings!

I say, my royal counterparts are really putting on a jolly good show this year – Bravo! 

Not only were we treated to a beautiful wedding as Prince Harry and Meghan Markle become the Duke and Duchess of Sussex - Oh, how spiffing! Then on Saturday 2nd June, we joined the gaiety as HM Queen Elizabeth II celebrated 65 glorious years on the throne – Well done your grace!

You see, my darling Mrs Simkins and fellow collaborator – to commemorate the anniversary of the coronation rustled up her majesty’s most favourite tea-time dessert - Chocolate Biscuit Cake. I say, and following such merriment we now prepare for our next royal ‘kneesup’ – the Queen’s official birthday of Trooping the Colour which takes on June 9th (2018). 

Darlings, our beloved sovereign is a ‘chocoholic’ of the incredibly ardent and incurable kind! So, with this in mind, and with a bit of an orange twist, I re-created the frightfully fabulous Chocolate Cream Roll which I discovered in my 1935 edition of The Radiation Cookery book. 

Of course, for her majesty’s official birthday Miss Windsor wished to ‘tickle one’s fancy’- Oh, I say! with a slice or two of Chocolate Orange Cream Roll - a light, tangy, incredibly moist, devilishly chocolatey, mouth-watering delight; slathered with a luxurious layer of Orange Butter Cream – and best enjoyed with a cup of your favourite Rosie Lee!

Now darlings, once you’ve laid your table fit for a QUEEN with all your finery, one may treatoneself to a pre-party drinkie! May I suggest, the Queen’s favourite tipple of gin and Dubonnet? - to be supped from a crystal glass tumbler, of course!

However, I must admit I'm not really in the mood for an alcoholic beverage, as my thirst yearns for a good old-fashioned cup of tea and a slice of cake.

Oh, and what a splendid way to ‘toast’ her majesty’s official birthday! 

God Save The Queen!

Preparation time: 20 mins / Cooking time: 10 mins

Serves: 8 delightful guests

Sponge Ingredients

  • 2 eggs 120g (just under 3/4 cup) caster sugar
  • 80g (3/4 cup) plain flour
  • 1 heaped tablespoon of cocoa powder
  • 1/2 teaspoon of orange extract
  • 1/4 heaped teaspoon of baking powder
  • 2 tablespoons of fresh orange juice
  • sprinkling of brown sugar
  • orange slices to garnish

Orange Butter Cream Ingredients

  • 85g (just over 1/3 cup or 3/8 cup) unsalted butter
  • 180g (1 & 3/4 cup) finely sifted icing sugar
  • 1 teaspoon orange extract or orange liqueur (add more to taste!) 
  • grated orange zest
  • roughly chopped dark chocolate chips

Equipage

  • electric hand-whisk
  • shallow baking tin – 9 x 13 inches or 23 x 33 cm (approx.)

Method

  1. Prepare one’s hands for your royal creation! Toddle off to the sink, and scrub- up well!
  2. Pre-heat your oven to 220 *C / 200 Fan / 425 *F / gas mark 7.
  3. To your mixing bowl add the eggs and whisk for a few minutes until pale– Ta very muchly!
  4. Add the caster sugar and whisk together for 5 minutes.
  5. With a steady hand stir in the sifted flour, chocolate powder, baking powder, orange extract, and fresh orange juice.
  6. Prepare your tin with greaseproof paper, then gently pour in the mixture and smooth over with a palette knife.
  7. Bake for approximately 8 to 10 minutes.
  8. Darlings, with great care, dampen a cloth with boiling water (I recommend an old tea towel) then place a piece of greaseproof paper over the top and sprinkle with brown sugar.
  9. Turn out your creation onto the sugared paper; remove the cooked paper from the sponge, then roll up!
  10. Allow to cool.
  11. Once cooled, it’s time to time to whip-up the Orange Butter Cream filling! So using a wooden spoon, simply beat together the butter and sugar to a cream, then add the orange extract or use a drop of orange liqueur.
  12. Darlings, now this step requires the aid of light hands! Carefully unroll the sponge and spread with the filling, then scatter with grated orange zest and a handful of roughly chopped chocolate chips.
  13. Stand for a few hours. When ready to serve cut into equal portions, then present on a pretty plate and garnish with a slice of fresh orange – Voila!
  14. Serve to your delightful guests with a cup of tea, by royal appointment of course!

Enjoy!


Mrs Simkins: The Queen's Favourite Chocolate Cake

June 2nd is the 65th Anniversary of the Queen’s Coronation

Miss Windsor and I can scarcely believe our Queen has now been on the throne for 65 years. It’s a whole lifetime! She is our longest reigning monarch, Queen Victoria ruled for 63 years, seven months and two days, in case you are wondering!

The Queen loves afternoon tea and there are several cakes she particularly enjoys: Dundee cake, ginger cake, sponge cake filled with jam and maybe cream, possibly Battenberg, but her favourite cake of all is chocolate biscuit cake.

She loves this cake so much, apparently, if it appears on the royal table one day she asks for it to be kept for her and brought back to her tea table every day until it has all gone. If it appears on the tea table on Thursdays, and the Queen is going to Windsor Castle for the weekend, it has to be wrapped up and sent over. I believe it’s carried over by hand.

With any other cake, incidentally, as soon as tea is over the Queen is quite happy for any leftovers to go to the staff dining room for their tea the next day. But not when it’s Chocolate biscuit cake! You may remember, it’s Prince William’s favourite too and he had a super-size version as his ‘groom’s cake’ at his and Kate’s wedding back in 2011.

The royal chocolate tiffin is made with dark chocolate, granulated sugar, butter, egg and Rich Tea biscuits and is covered with more dark chocolate. There may be glace cherries and nuts. Made in a round cake tin, it’s completely covered in chocolate and decorated.

What better cake to make in honour Her Majesty’s 65 year reign? Here’s a similar mini version made in a pudding basin. Providing you can keep them cool you could make several for your garden party.

  • 3 tablespoons golden syrup
  • 75g butter, diced
  • Approximately150g Rich Tea biscuits broken into small pieces
  • 25g cocoa powder
  • 50g dried cherries

Plus:

  • 100g dark chocolate, broken into pieces
  • 15g butter, diced
  • Decorations of your choice

You will need a lightly greased 1 pint pudding basin, lined with cling film: leave enough over-hang to take hold of easily

Melt golden syrup gently in a pan and stir in butter. Once butter has melted, stir in biscuits, cocoa powder and cherries. Pile into basin and smooth down evenly with the back of a dampened metal spoon. Make sure the bottom is level as this will be the base of the cake.

Chill for 3 hours. 

To cover the cake: microwave chocolate in a heatproof bowl on High, in 30 second bursts: it will take a couple of minutes or so in all.

(Alternatively, melt chocolate in a bowl over a pan of barely simmering water: choose a bowl that will fit comfortably in the top of the saucepan but without the bottom touching the hot water.)

Stir in butter towards the end of melting time. 

Loosen cake with a small palette knife and ease out of basin. Stand it, flat side down, on greaseproof paper. Remove cling film. Pour chocolate over the top smoothing it down the sides. 

Position decorations before chocolate sets. Trim away excess chocolate from the bottom with a sharp knife and peel off the paper. Keep cool and covered until ready to serve.

Cut the cake at the table, in slices crossways rather than wedges, with a sharp knife dipped in boiling water.

Congratulations Ma’am!

Follow Mrs Simkins on Twitter. @MrsSimkinsCooks


Mrs Simkins: Dainty Tea-Time Sandwiches

Lovely as cakes are, you can’t have a tea party without a savoury element to begin with, including some delicate little sandwiches: “Sandwiches before cake,” as my mum used to say and I know Miss Windsor agrees wholeheartedly with this sentiment!

Here are some sandwich suggestions to start you off: several based around cucumber (essential for keeping your cool in summer) and some tips for the perfect egg mayonnaise filling.

Don’t forget to cut the crusts off all your sandwiches and cut into dainty fingers or triangles.

They are called finger sandwiches, by the way, because you eat them with your fingers.

Classic Cucumber

Cucumber sandwiches are the classic afternoon tea sandwich. Prepare the cucumber in the traditional way by peeling it and cutting it into wafer thin slices. Lay the slices on a double thickness of kitchen paper and sprinkle lightly with salt – a light grinding of Maldon salt is perfect. Lay a couple more layers of kitchen paper on top and leave for 10-20 minutes. This draws out excess moisture from the cucumber and deepens the flavour.

Sprinkle the cucumber lightly with ground white pepper and sandwich between thin slices of premium quality white bread, spread with a softened creamy unsalted butter to balance the cool, salted cucumber. Remove crusts and cut sandwiches into dainty triangles.

Cucumber and Cress

Prepare this Victorian favourite as above but turn up the heat with some peppery snipped mustard cress.

Cucumber and Soft Cheese

Prepare cucumber as before, spread thinly-cut brown or white bread with a thin layer of unsalted butter and a more lavish one of soft cheese. Scatter with freshly ground black pepper and lay cucumber over.

Cucumber and Cheese Mayonnaise in Malted Granary Bread

This is so delicious, rich and satisfying: I’d say it was my own invention but someone else somewhere is bound to have thought of it too! Using 2 dinner forks, combine mature grated cheese with enough mayonnaise to bind and season with cayenne pepper. Sandwich between malted brown bread and include cucumber as before.

The Perfect Egg Mayonnaise

The classic egg mayonnaise sandwich is always popular.

Here are a few tips for the best ones ever.

  1. Use eggs that are several days old for hard-boiling: very fresh eggs are a nightmare to peel - you’ll find yourself pulling away chunks of white with the shell.
  2. To hard-boil: bring water to a fast boil and add eggs once water is boiling, Set a timer and boil for seven to eight minutes only depending on size. Longer than this and they can become bouncy and rubbery and start to smell a little bit sulphurous!
  3. Remove from heat immediately the time is up and plunge into cold water. Once cold, roll eggs briskly on a flat surface and peel off shell. Those nasty dark rings round the yolks can develop otherwise.
  4. Chop roughly with a sharp knife and then mash finely with a dinner fork. Add just enough mayonnaise to bind.
  5. Lightly spread brown or bread with softened butter and then with the egg mixture.
  6. Arrange on serving plate scattered with snipped cress.

Extra Tips

Don’t go too mad with the filling as an overstuffed egg sandwich can be disastrous for garden party clothes and tablecloths.

You might find it easier to mash and mix the eggs on a board rather than in a dish: you can get a better angle with the fork on a board and it’s a lot simpler.

Follow Mrs Simkins on Twitter. @MrsSimkinsCooks


Tea Review by Miss Windsor: Fortnum and Mason’s Wedding Bouquet Blend

Hello, darlings!

Mrs Simkins and I have joined together in ‘matrimony’ – Ha, ha, got you there! Of course, I meant to say the beauteous Meghan (real name: Rachel!) and dashing Harry (real name: Henry!) exchanged vows on Saturday 19th May 2018 and became the Duke and Duchess of Sussex – curtsy, please! Indeed, I wish them every happiness in their covenant of LOVE.

Moving on gracefully to my collaboration with Mrs Simkins! You see, to complement her scrumptious Lemon and Elderflower Butterfly Cakes, which tastefully mirror the married couple’s glorious wedding cake of lemon and elderflower sponge decorated with Swiss meringue. I sourced an extra special tea created by Fortnum and Mason of London – The Wedding Bouquet Blend – which commemorates the marriage of Miss Windsor’s royalcounterparts! 

Darlings, this rather interesting blend of tea that looks awfully like ‘potpourri’; yet quite astoundingly smells like a packet of Rowntree’s Polos! comprises of Green Jasmine Tea, peppermint, rose petals and blue cornflower petals. Yet interestingly, Fortnum and Mason carried out a ceremony of their very own and married off the English and American-grown ‘mint’ with Jasmine Green Tea – Well, so it says on the tin! 

Of course, and it goes without saying, I prepared this creative concoction using my prizedBrown Betty teapot. I dare say Brown Betty really enjoyed being part of the gaiety and revelled in the experience to brew a royal blend in her magnificent trunk – Oh, how lucky of her! 

Ok, let’s get down to business! I know you’re dying to find out about the taste, and if Miss Windsor deems it an appropriate choice of tea for ‘tying the knot’, so to speak! Well, once brewed for approximately 2-3 minutes I poured myself a generous cup. I say it looked slightly yellowy/beige in colour, which I thought would perfectly work well with Mrs Simkins fluttery Lemon and Elderflower Butterfly Cakes – visually a great match! 

Darlings, as I gently took a sip I noted how extremely smooth it was delivered, and settled upon one’s refined palate with such ease and grace – Well, what else would one expect from London’s finest – Fortnum and Mason! I was then greeted by an explosion of flavours, yet I quickly realised that the newly-weds - Green Jasmine Tea and peppermint were definitely competing for my attention!

First off, I was mesmerised by the mellow yet tangy taste of the Green Jasmine Tea, which I hoped to be accompanied by a touch of English rose – but unfortunately, that didn’t quite occur! Therefore, I do wonder if the addition of rose petals, just like the blue cornflower type were merely for decorative purposes? If so they certainly added charm to an English country garden version of potpourri, or according to Fortnum and Mason – a wedding bouquet – Hmmm? 

I must say, for a scanty while my taste buds swarmed with sheer delight, until smack, bang, wallop, I was hit by an intensely refreshing dose of peppermint! However, although it was pleasingly vibrant; this particular ingredient was somewhat overwhelming, and with great annoyance lingered in one’s throat – I say, it was rather like the sensation of ‘toothpaste’!

Darlings, I believe this tea is of an acquired taste, and to be frank, it struggled to get me in the mood for wedding bells. However, saying that, I believe it’s the ultimate tonic to be quaffed before you walk down the aisle and prepare for your wedding kiss, as it will freshen one’s breath and clear one’s nose – Oh, yes, the incredible power of dual action! 

I do hope you royally enjoyed my ‘tea-tastic’ review!

Until next time,


Letter from Mrs Simkins to Miss Windsor on her Wedding Bouquet Blend Tea Review

May 25th 2018

“My dear, I have finally found a moment to try the wedding tea you so kindly sent me. It’s odd, but possibly the other way round from you, although I thought it looked so pretty, I was expecting not to actually like it very much! But I did! In fact I loved it!”

As you know, I’m not a great one for herbal and flower teas, but I do quite like mint tea, and one of my favourite teas of all time is Lady Grey blend from Northern Teas, a gorgeous Earl Grey with blue cornflowers

Anyway, I brewed my wedding tea in my 2 cup Cornishware blue betty – just the right size, I thought - using 3 heaped teaspoons and boiling water to the top. I waited 3 minutes and poured. I debated using a tea strainer but decided against it, the leaves fall to the bottom anyway leaving the tea clear. I took some fresh dry rose petals and cornflower petals from the jar and floated them on top. I love the way the cornflowers unfold in the hot liquid: it’s the same with the Lady Grey blend.

I let it cool for while and took a sip. My dear, I know exactly what you mean: but I found it mellow and refreshing, I liked the mint tempered with the Green Jasmine and I loved the floating petals. My pot ran to 2 ½ dainty tea cups and I drank it all!

It’s fascinating isn’t it? How different all our palates are? And how our preconceived expectations as to whether we will like something or not are constantly being challenged!

Really, my dear, if you aren’t keen, send it over to me, I’ll have it! Bless you and thank you again.”

Follow Mrs Simkins on Twitter. @MrsSimkinsCooks

Brian Whittaker says:

Hello, I really enjoyed this super-duper post. Funny and interesting. Looking forward to more of your collaboration with Mrs S. Cheers.

Mrs Simkins replies:

Thank you Brian, bless you. Miss Windsor and I make a great team!

Elizabeth J Duncan says:

Although I am not a fan of peppermint tea, I adored this sparkling review!

Mrs Simkins replies:

Thank you so much Elizabeth! I know what you mean about peppermint but, for me, the Green Jasmine really softened it.


Mrs Simkins: Royal Wedding Inspired Lemon and Elderflower Butterfly Cakes

Miss Windsor and I send our very best wishes to newly married royals Harry and Meghan, the Duke and Duchess of Sussex. And what a fabulous wedding they had, so very moving and full of wonderful and lovely surprises. Their wedding cake looked absolutely glorious: simple at heart, yet gorgeous, lemon and elderflower sponge decorated with Swiss meringue buttercream frosting and 150 fresh flowers, including white peonies (Meghan’s favourite) and roses.

These delicate little butterflies are our tribute to them and their lovely cake and perfect for summer garden parties. You can bake these yourself at home and waft around your garden party carrying them on a romantically decorated tiered cake stand.

A food processor makes light work of the cake mix but use an electric mixer or whisk by hand if you prefer.

Makes 15-18 cakes

  • 175g salted butter, softened
  • 175g caster sugar (golden works well)
  • Finely grated zest of 2 large lemons
  • 175g plain flour
  • 1 level teaspoon bicarbonate of soda
  • 2 level teaspoons cream of tartar
  • 3 medium eggs
  • 2 tablespoons elderflower cordial

Preheat oven to 160C (fan ovens) gas mark 4 or equivalent

You will need up to 18 paper cupcake set out in 2 x 12cup muffin tins (cupcake cases can vary in size slightly depending on brand)

Whiz butter and sugar together in the processor until creamed and fluffy. Add lemon zest just before the end and whiz in briefly.

Add raising agents to weighed flour.

Sieve some flour over the mix, add eggs then sieve remaining flour on top.

Whiz to combine. Add cordial and whiz until smooth and glossy.

(You will need to scrape the mixture down from the sides a couple of times with a flexible spatula.)

Divide mixture equally between paper cases: around a dessertspoonful for each case.

Bake for around 15-20 minutes until risen and golden and springy to touch: a skewer inserted should come out clean.

Leave to settle for a few moments then remove from tins and cool on a wire rack.

Once cakes are cool slice a circle from the top of each.

Spoon a little dollop of buttercream onto each cake. Cut each cut-off top in half to make wings and arrange on top of the buttercream.

Dust with icing sugar just before serving.

Tip: if you prefer to make a sponge sandwich cake, divide the mix between 2 18cm (7inch) loose-bottomed sandwich tins and bake for 18-20 minutes at 160C as before.

Lemon Buttercream

  • 110g salted butter, softened
  • 225g sieved icing sugar
  • 2½ -3 tablespoons lemon juice

Beat the butter until creamy in a roomy bowl. Add the icing sugar, a little at a time and stir vigorously to combine. Finally, stir in the lemon juice to loosen the mixture to spreadable consistency.

Alternatively, for even faster easier icing, whiz the butter and icing sugar together in the clean dry processor bowl. Add lemon juice through spout and whiz until smooth and glossy.

Follow Mrs Simkins on Twitter. @MrsSimkinsCooks

Brian Whittaker says:

Hello. I like this recipe very much. I think I could make these. Very nice photos. Thank you.

Mrs Simkins replies:

Bless you, Brian! Thank you very much indeed for your kind comment. Honestly, they are so easy. Tip: use a proper cook's measure tea spoon to measure raising agents for complete accuracy.